• 🔰🍞Easy Beginner Sourdough Bread

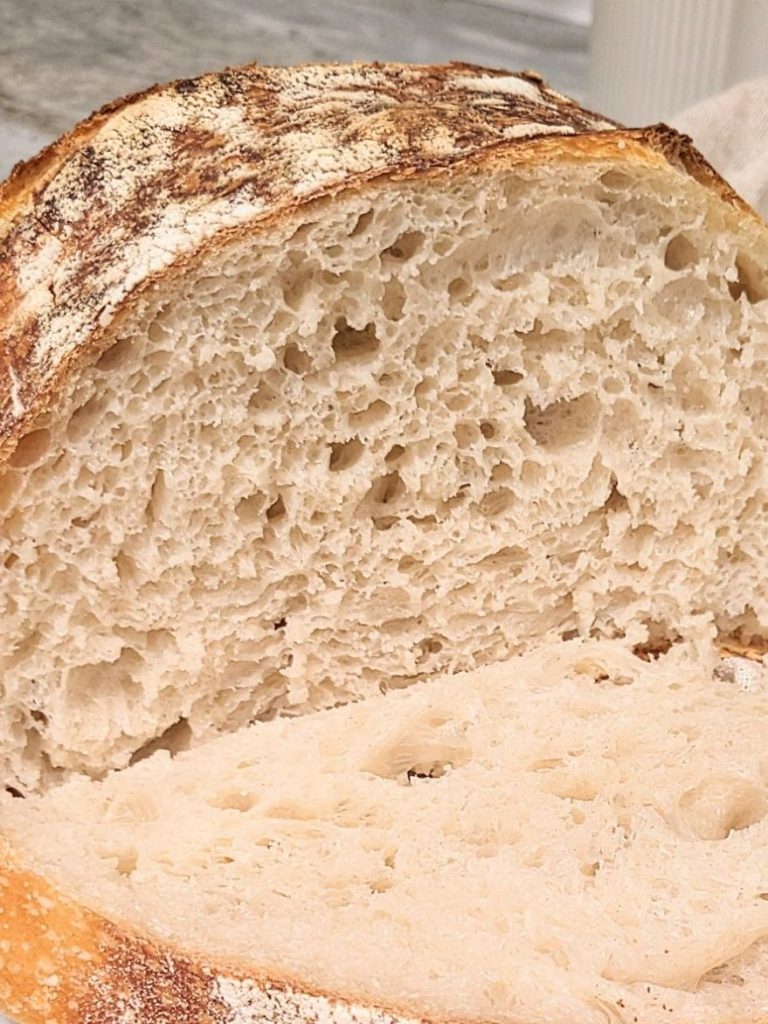
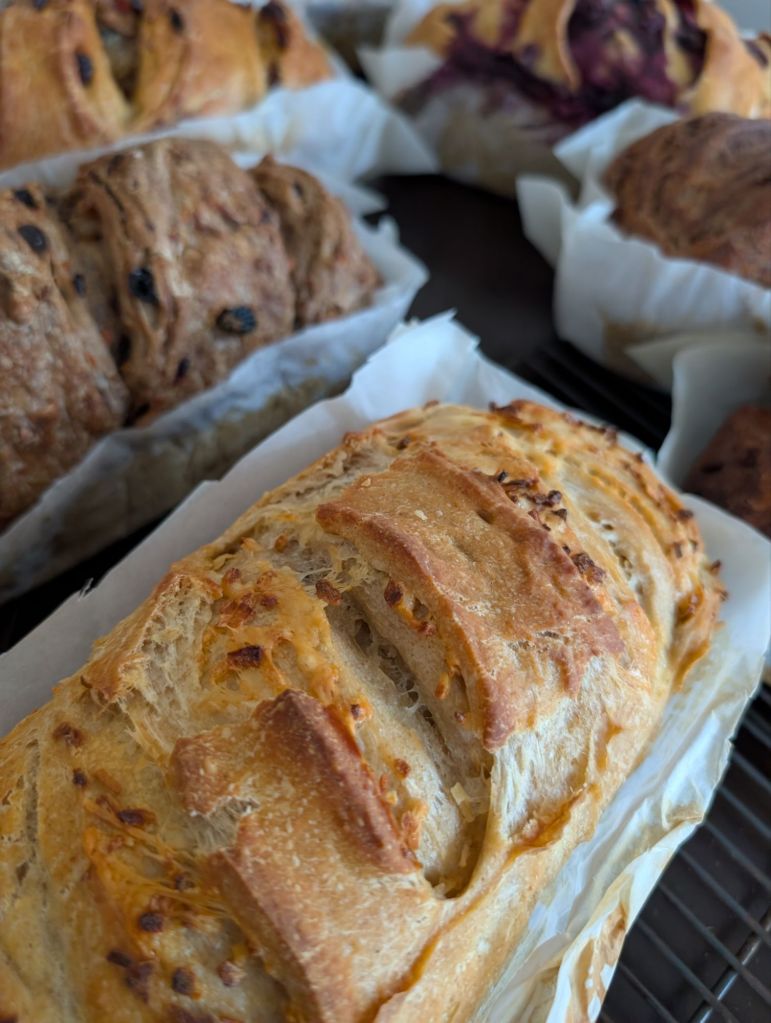
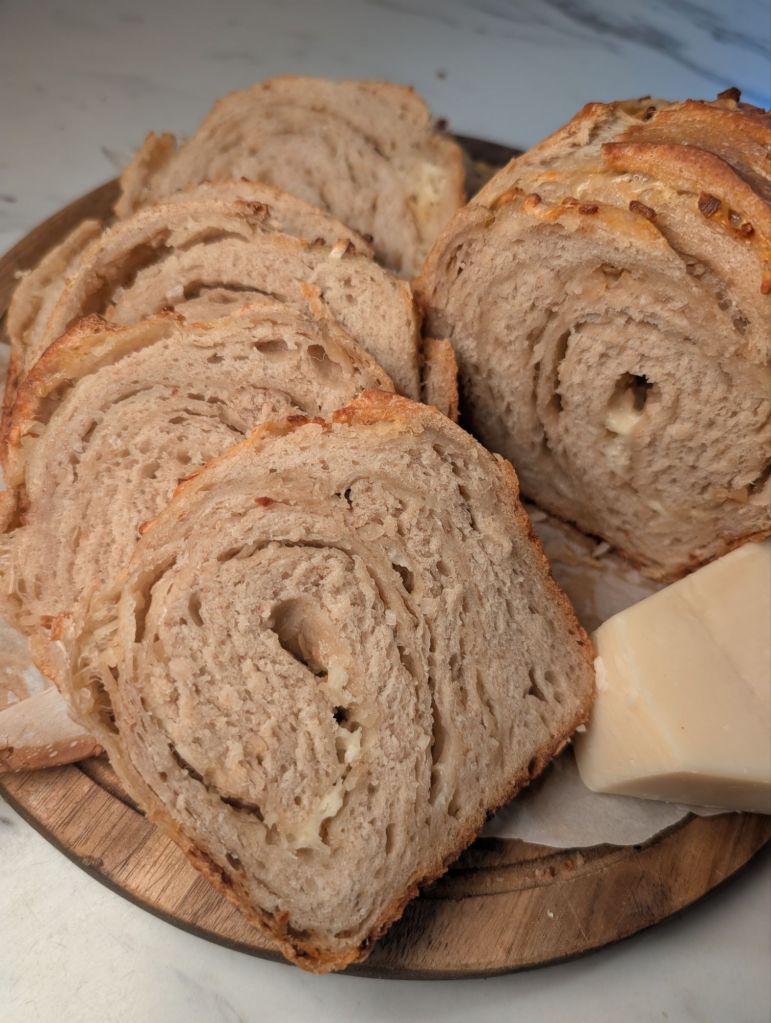
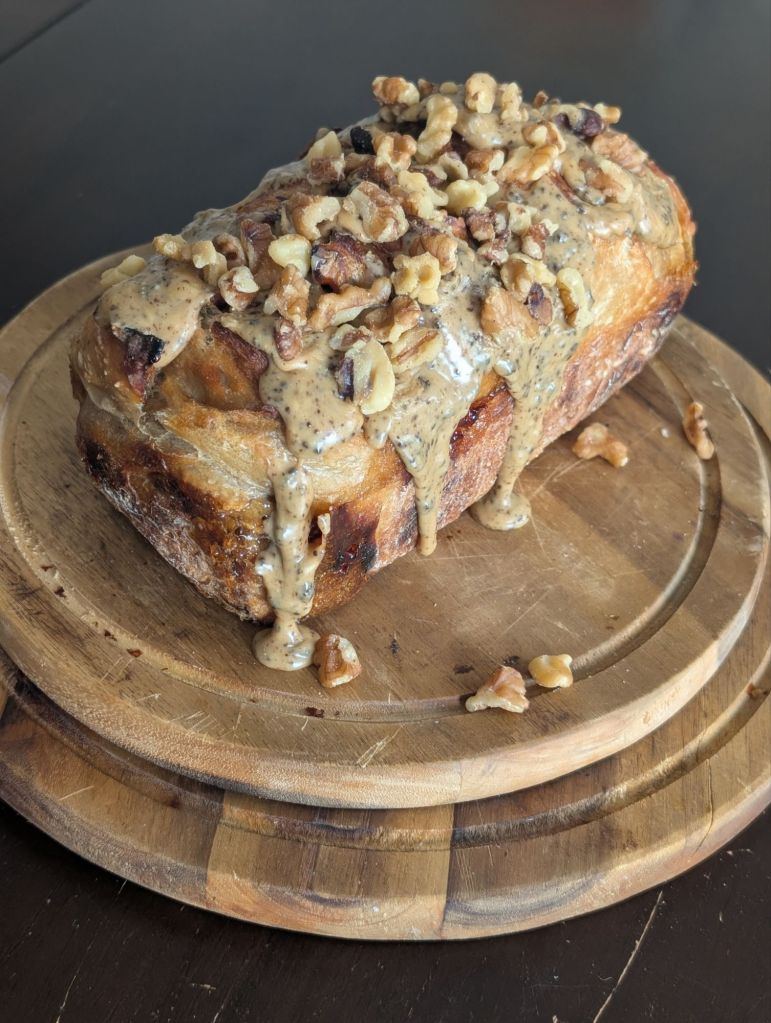
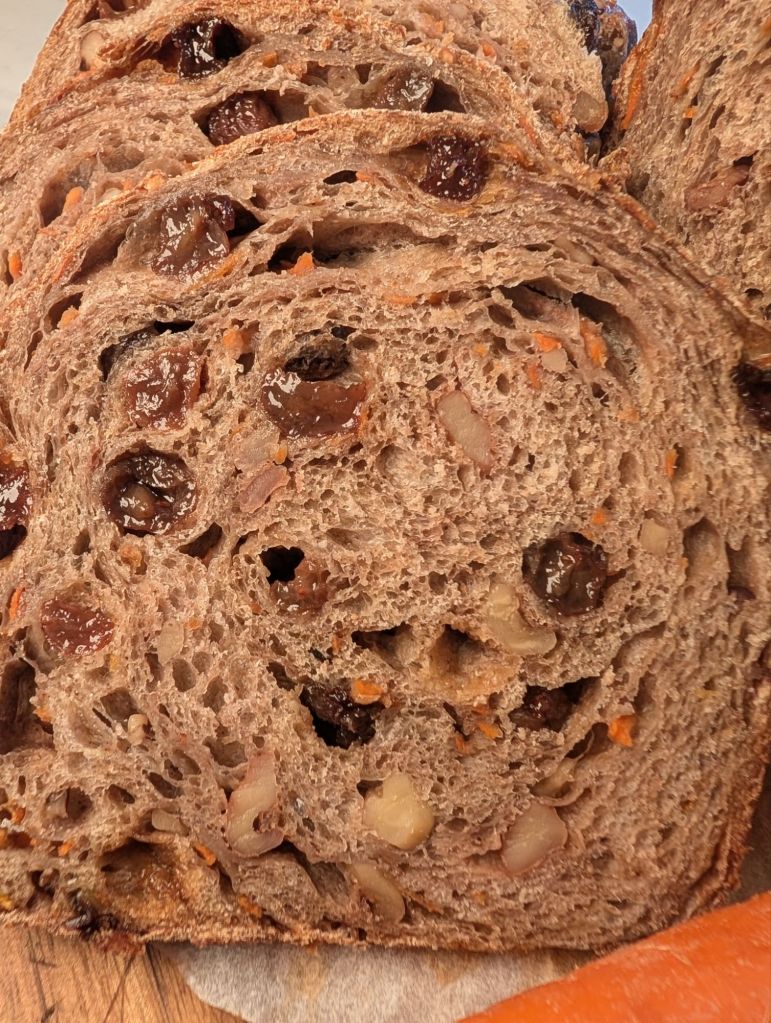
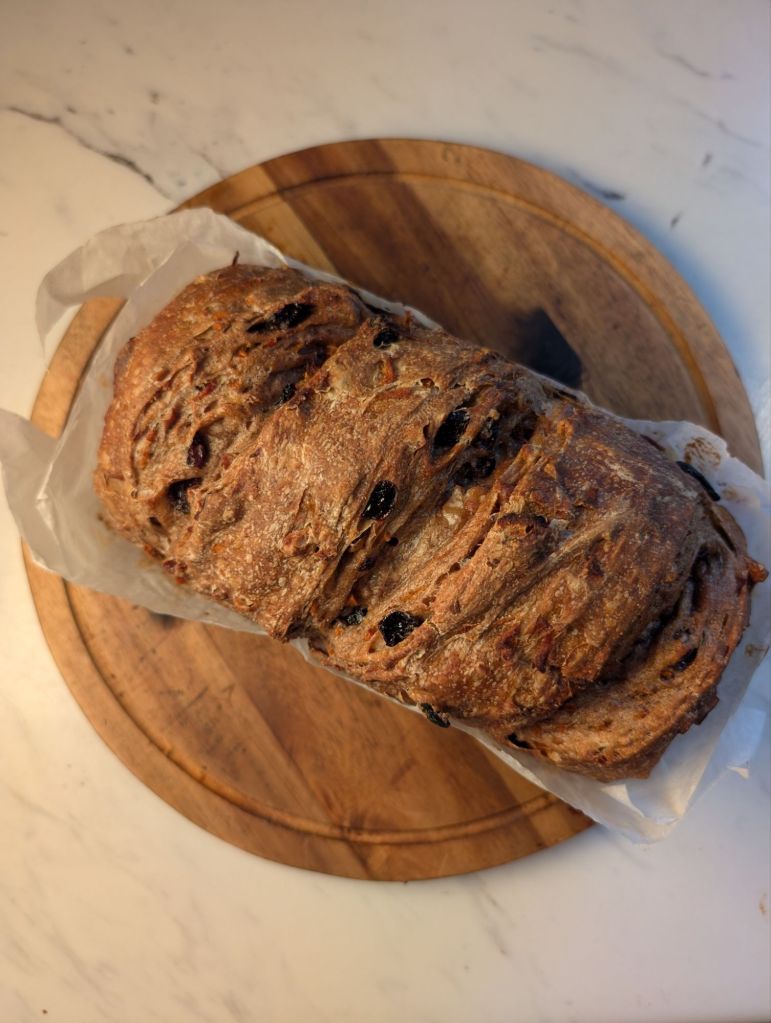
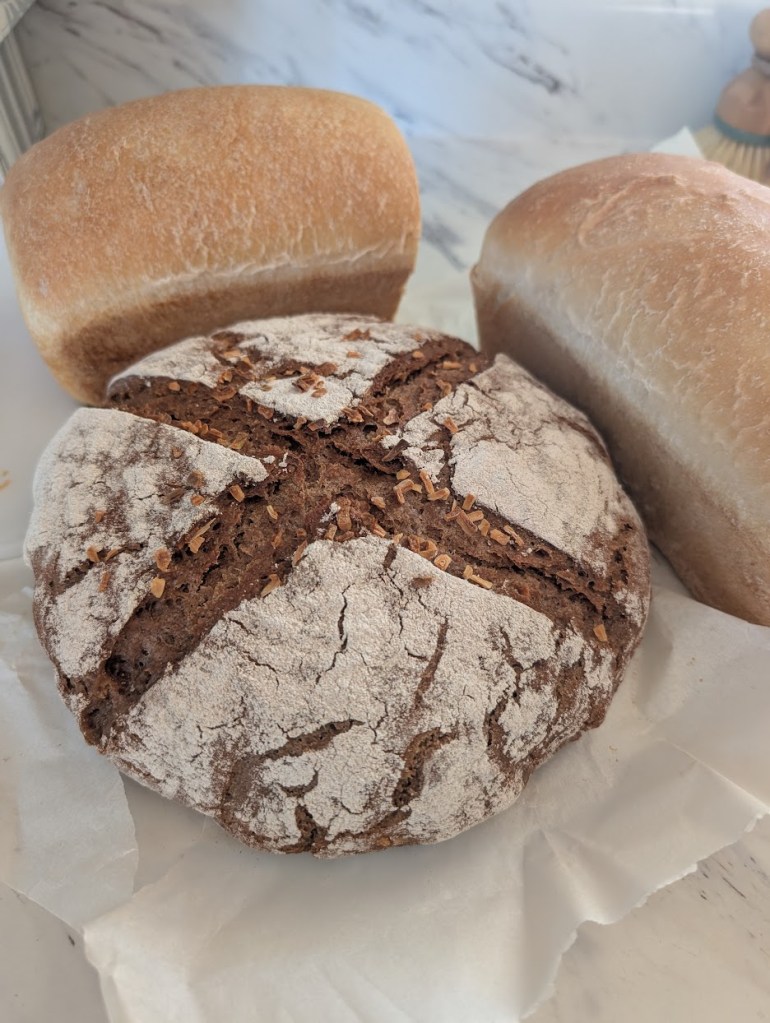
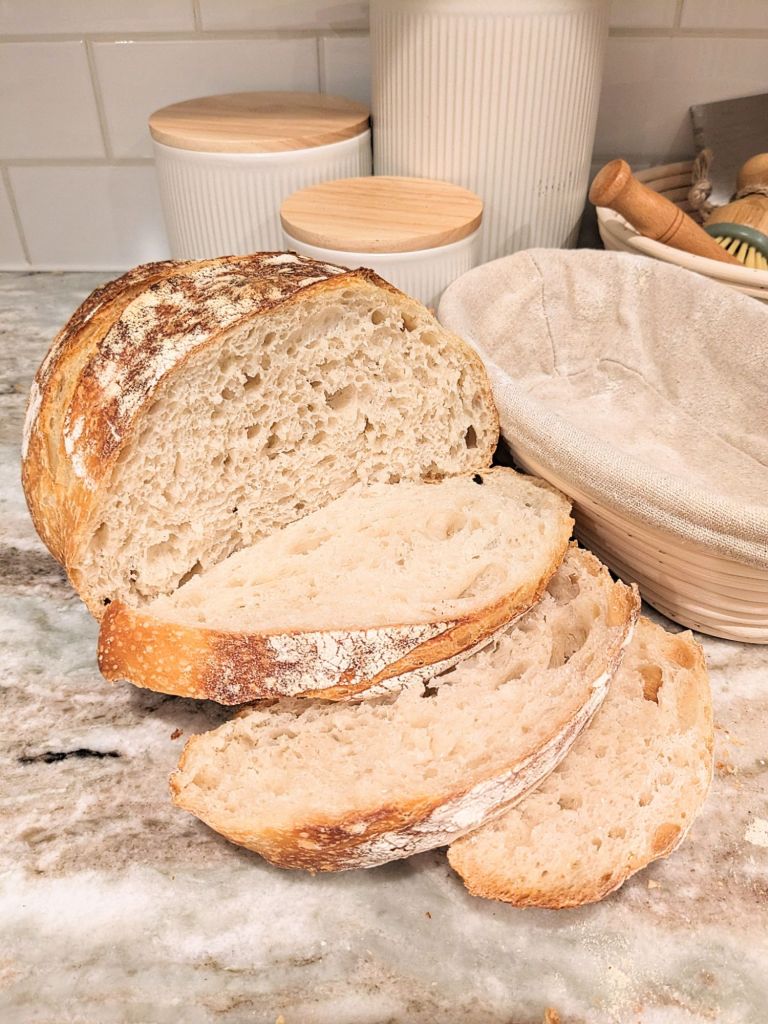
    This is my recipe for fresh sourdough bread with a light airy crumb and a golden crunchy crust.

    What is Sourdough Bread?

    Sourdough bread is leavened naturally with a starter made from wild yeast in the environment instead of commercial yeast or a chemical leavening like baking powder or baking soda.

    What is Sourdough Starter?

    Sourdough starter is a mixture of flour and water that uses wild yeast from the environment and lactobacilli. This ancient technique is what makes the bread rise.

    You can make your starter from scratch (preferably in the warmer months, unless you have a very warm area in your home) with un-bleached flour and distilled or well water. I don’t recommend using city water, as it contains chemicals that will kill the bacteria and your bread will not rise. Your starter will need to be fed every day until it is mature (2-4 weeks depending on water and climate), at which point you can keep it in the refrigerator until you need it. It can be kept in the fridge for a couple of months in-between uses (be sure to keep in the coldest area of the fridge). You may need to feed it twice to wake it up before using.

    You can also buy a starter from a reputable source, which will be mature right away, and you can start baking immediately.

    What Do You Need?

    • Digital scale
    • Large bowl
    • Dough whisk
    • Baking bench scraper
    • Tea towels
    • Parchment paper
    • Banneton basket or bowl
    • Active bubbly starter
    • Razor
    • Dutch oven
    • Sharp knife
    1. Mix the Dough
    2. Stretch and Fold
    3. Bulk Fermentation
    4. Shaping and Bench Rest
    5. Second Proof
    6. Scoring and Baking

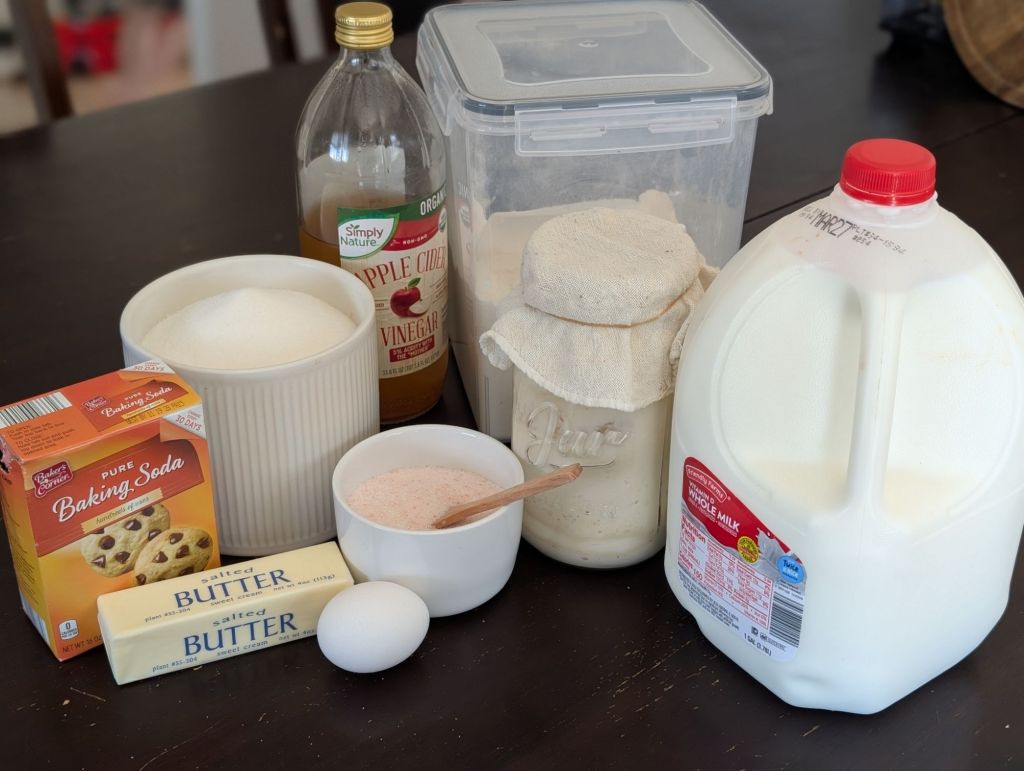
    To make a classic sourdough bread, you’ll need the following ingredients:

    • 50-100g active bubbly starter (less if you are in a warmer climate, more if you are in a colder climate)
    • 375 g of warm water (distilled or well, do not use city water)
    • 500 g of un-bleached bread flour
    • 12 g salt

    Here are the steps to follow:

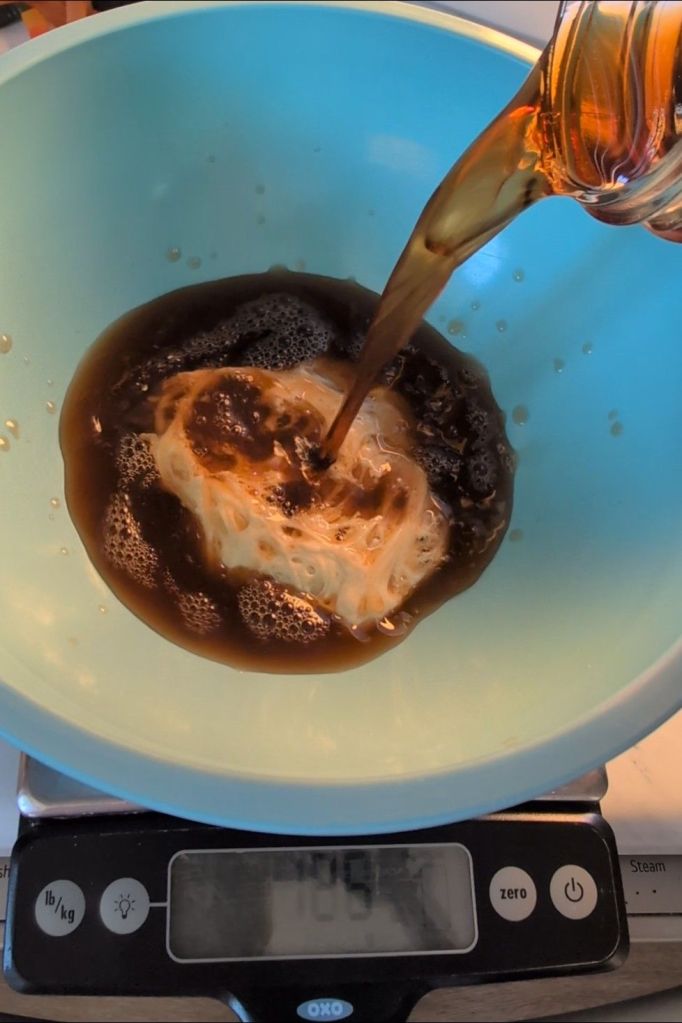
    1. In a large mixing bowl, combine the sourdough starter and water.
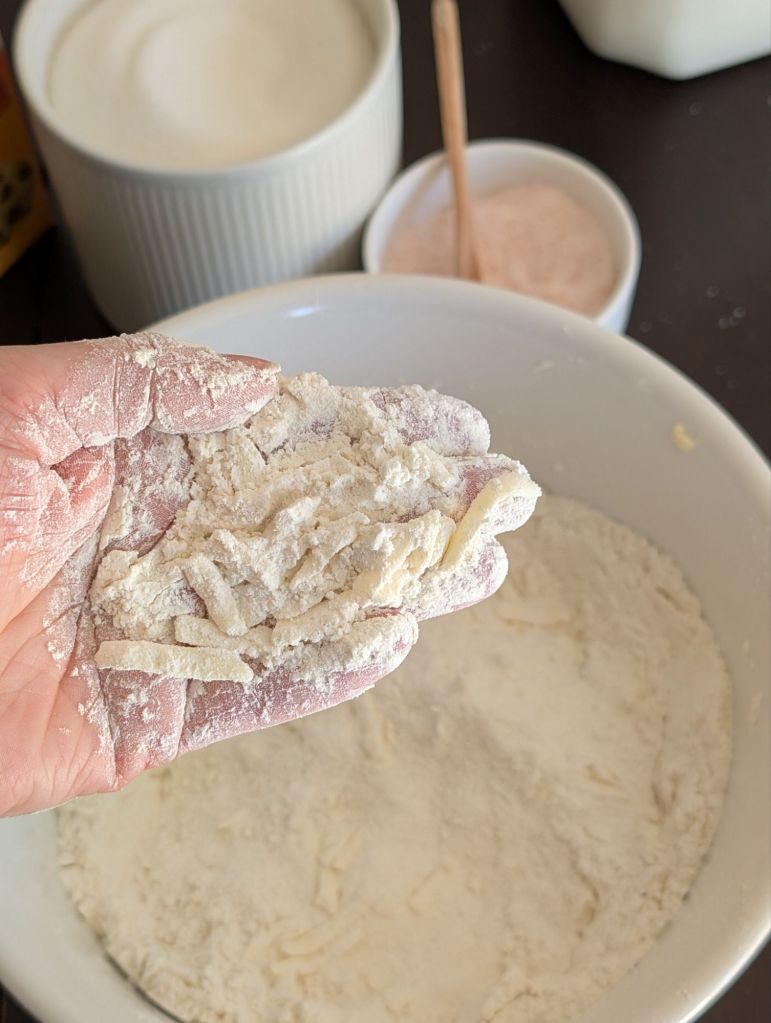
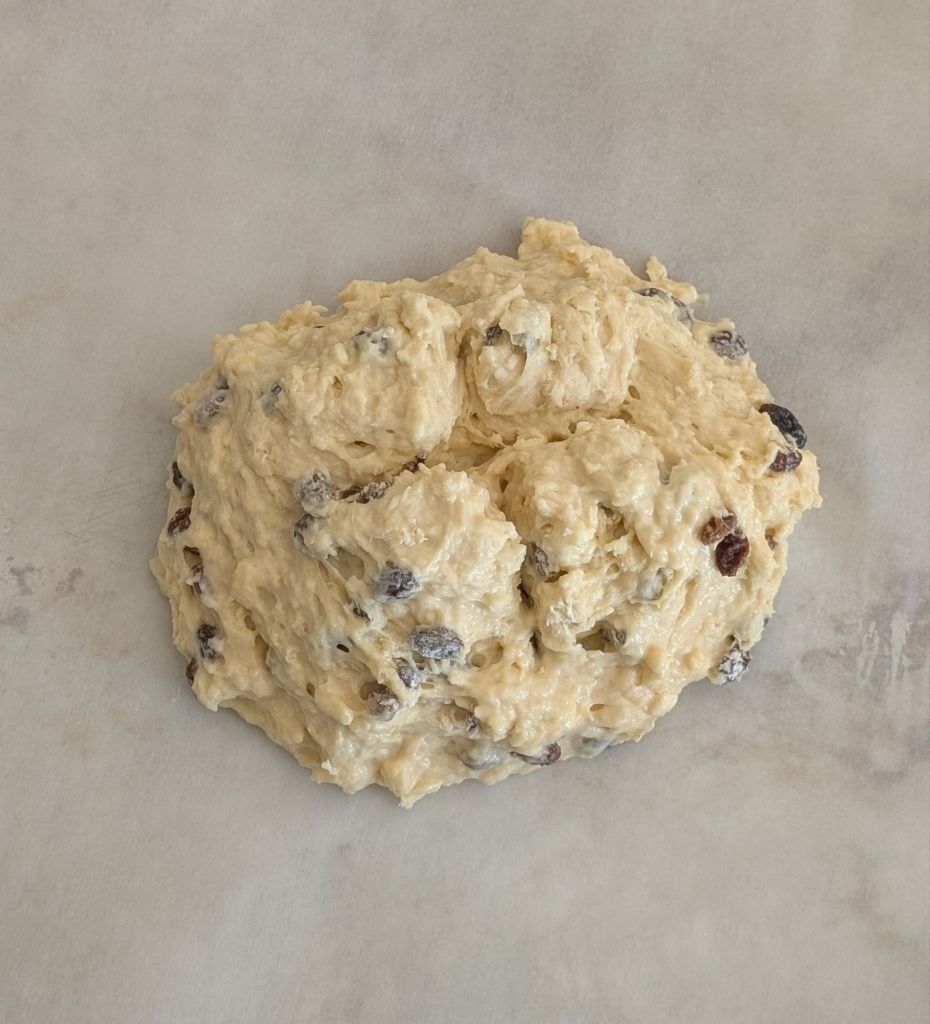
    2. Add the flour and salt, mixing with a dough whisk until a shaggy dough forms.
    3. Cover with a damp tea towel and let rest for 30-45 minutes.
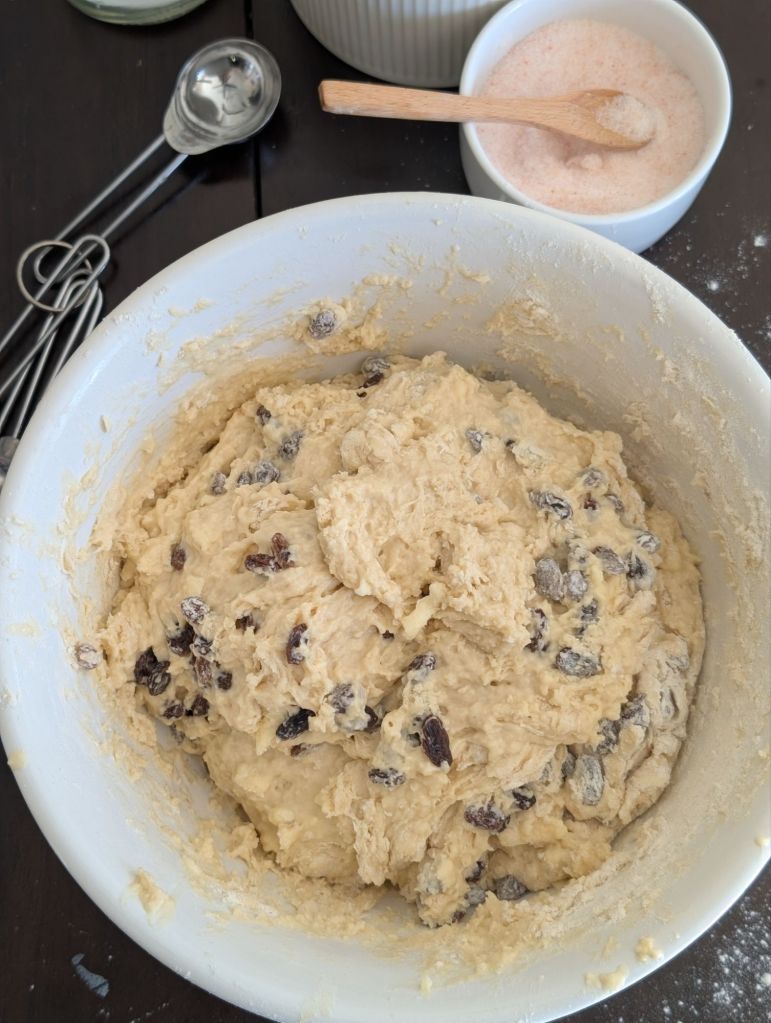
    4. Perform a series of stretch and folds every 30 mins, stopping after 2-3 hours.
    5. Place the covered dough in a warm area for 8-10 hours (or until it has reached 150% of it’s size)
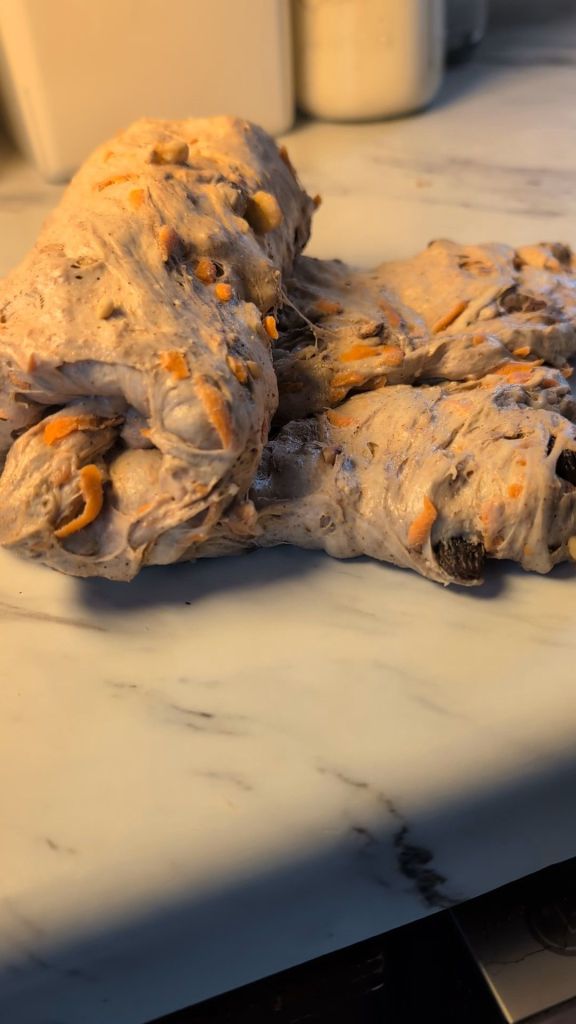
    6. Using a bowl scraper, remove the dough from the bowl onto a lightly floured surface.
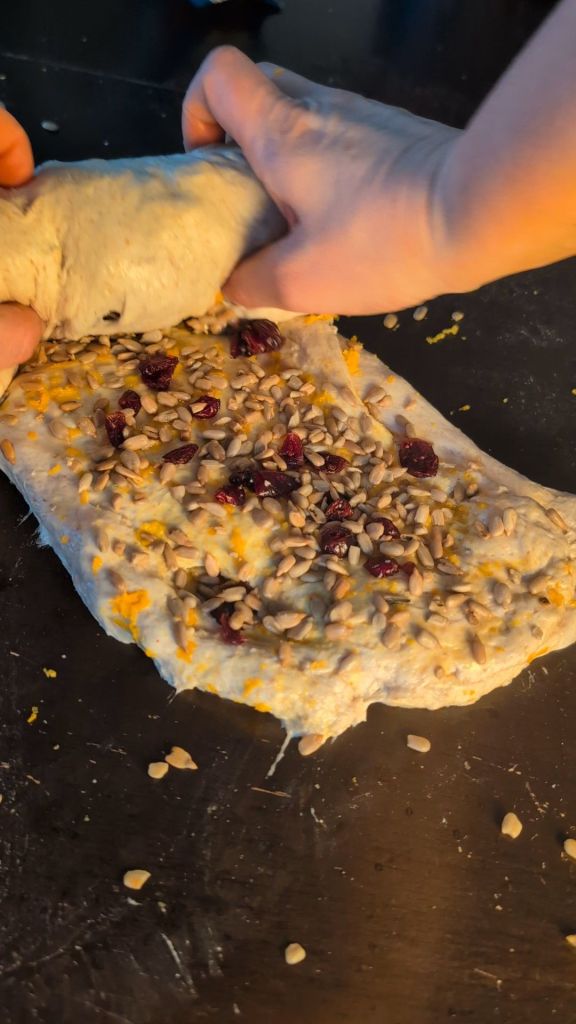
    7. Perform one more stretch and fold, flip it over, and shape into a round by turning it a quarter turn and tucking your hands under the dough. Let it bench rest for 30 minutes.
    8. Prepare a bowl or banneton basket with a dry tea towel and lightly dust with flour. Place the dough in seam side up.
    9. Cover with a tea towel and place the the refrigerator for 12-48 hours. (the longer it ferments, the more open the crumb will be)
    10. When you are ready to bake, preheat a dutch oven to 500 degrees for 30 minutes.
    11. Flip the dough over onto a piece of parchment paper (seam side down).
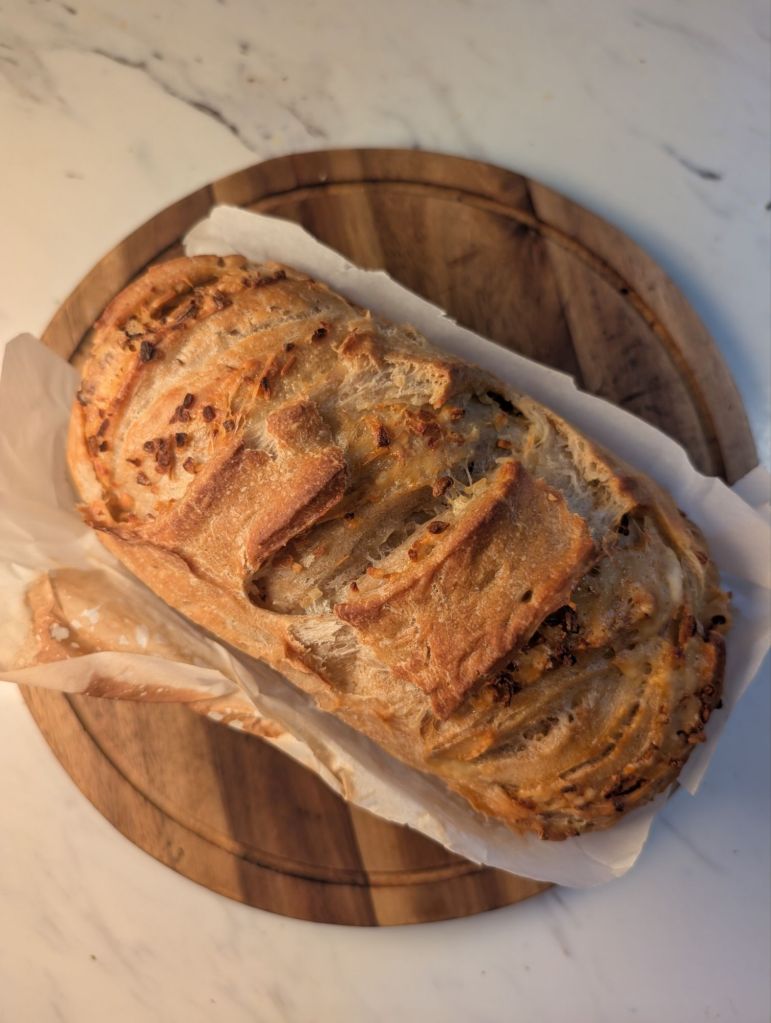
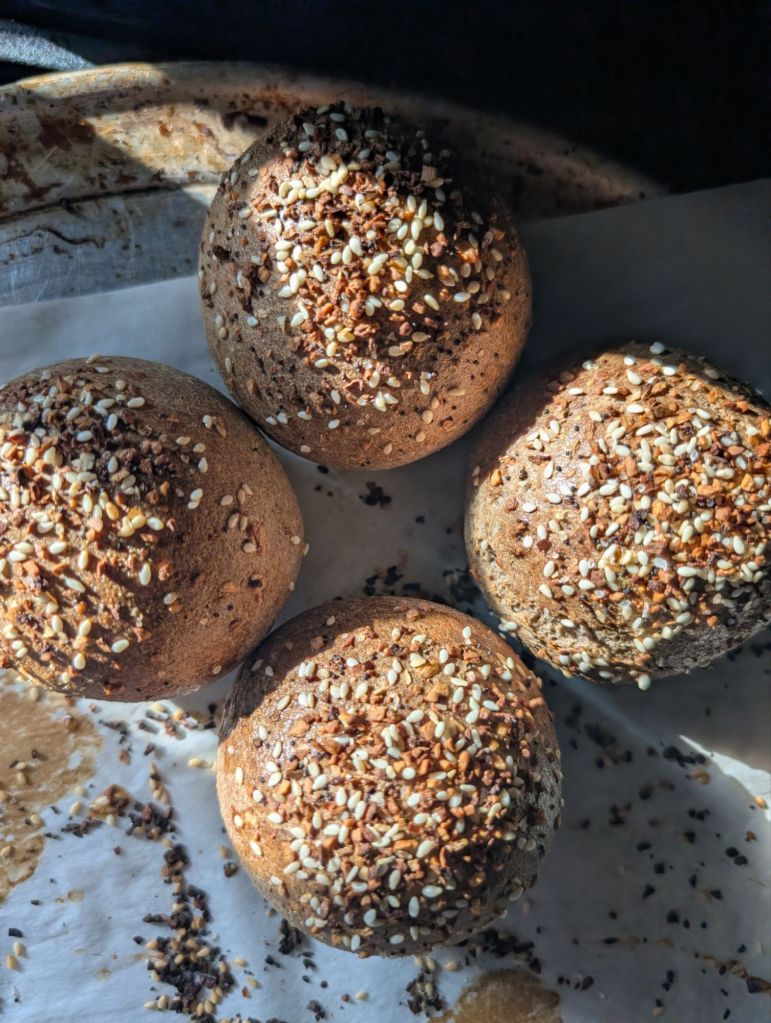
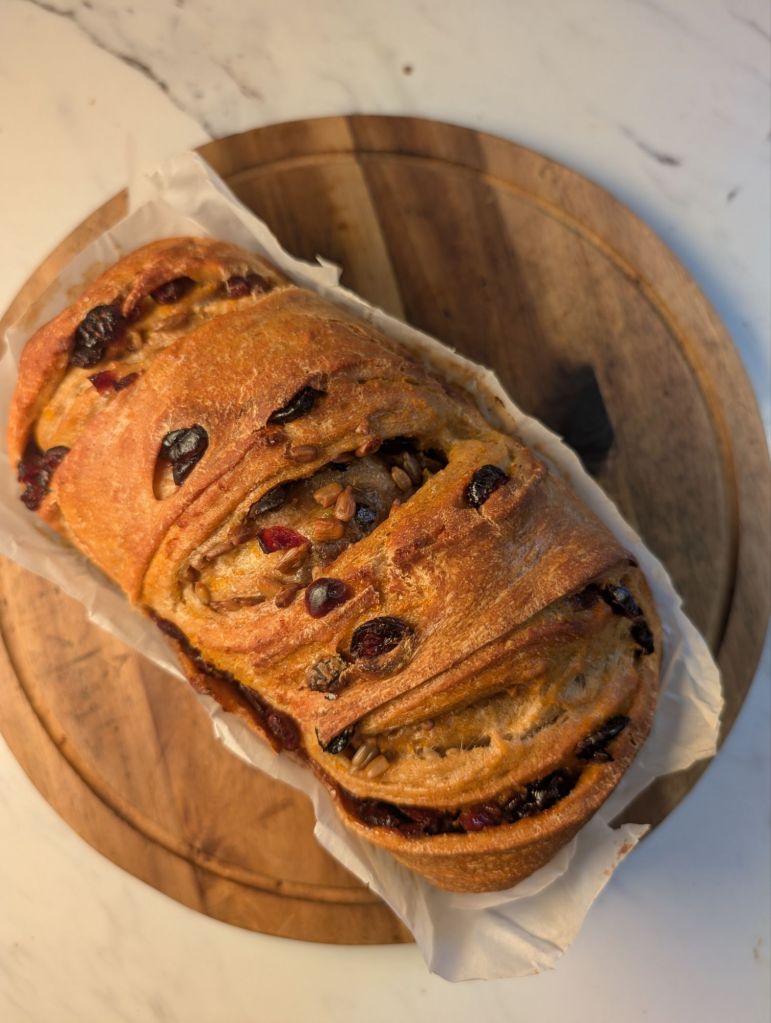
    12. Score an “X” into the top of the loaf using a razor, place it into the preheated Dutch oven, cover with the lid, and bake for 30 minutes.
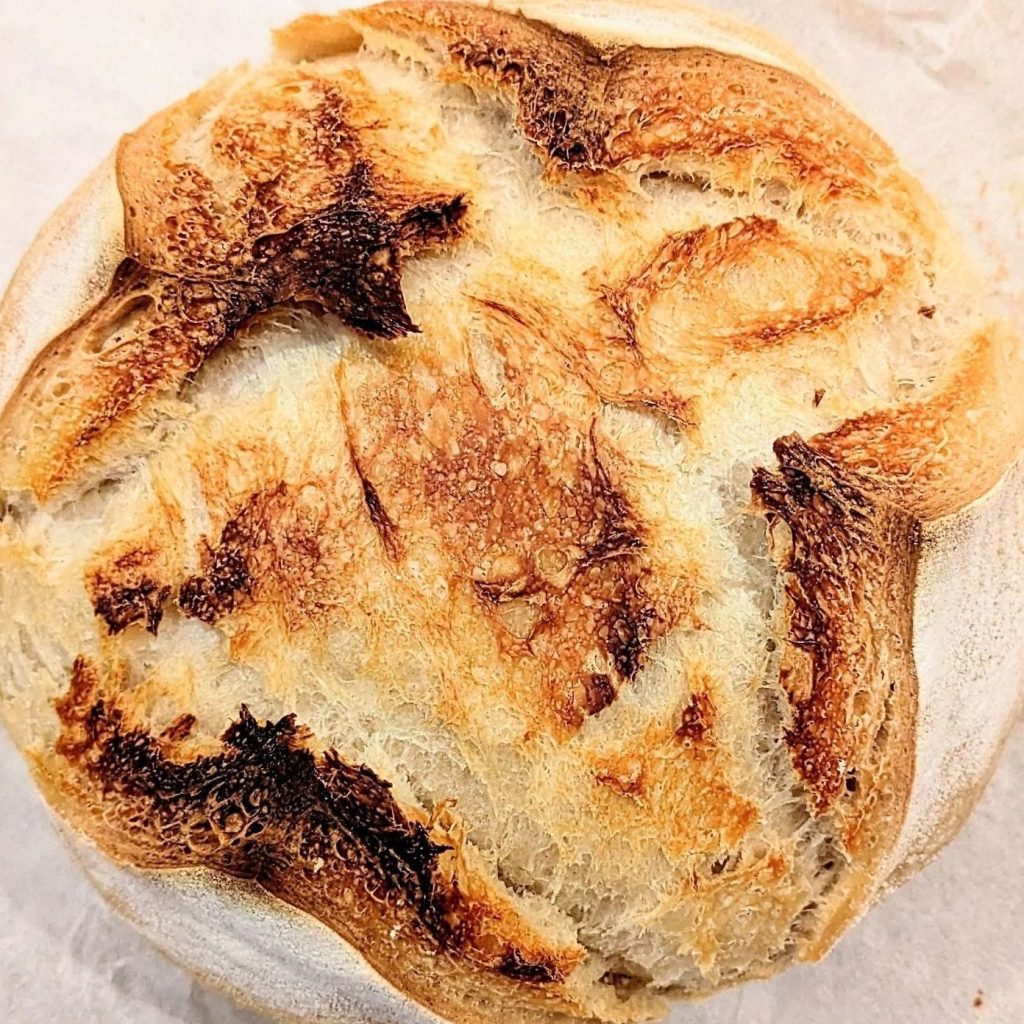
    13. Remove the lid and bake for an additional 15 minutes, or until the crust is golden brown.
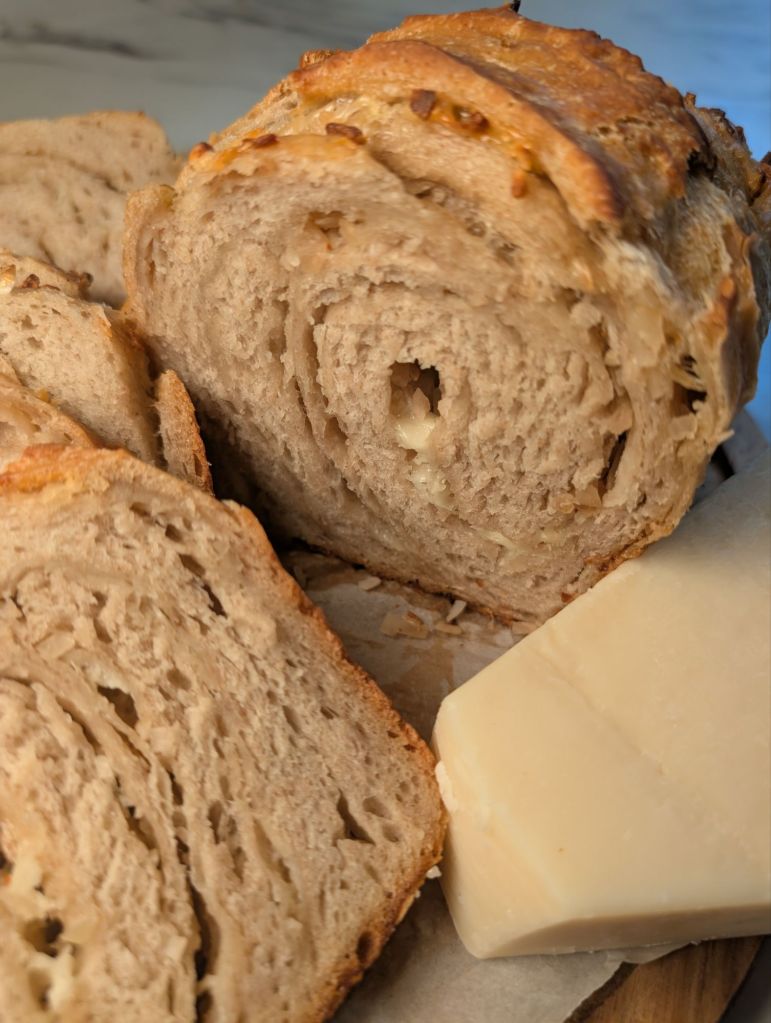
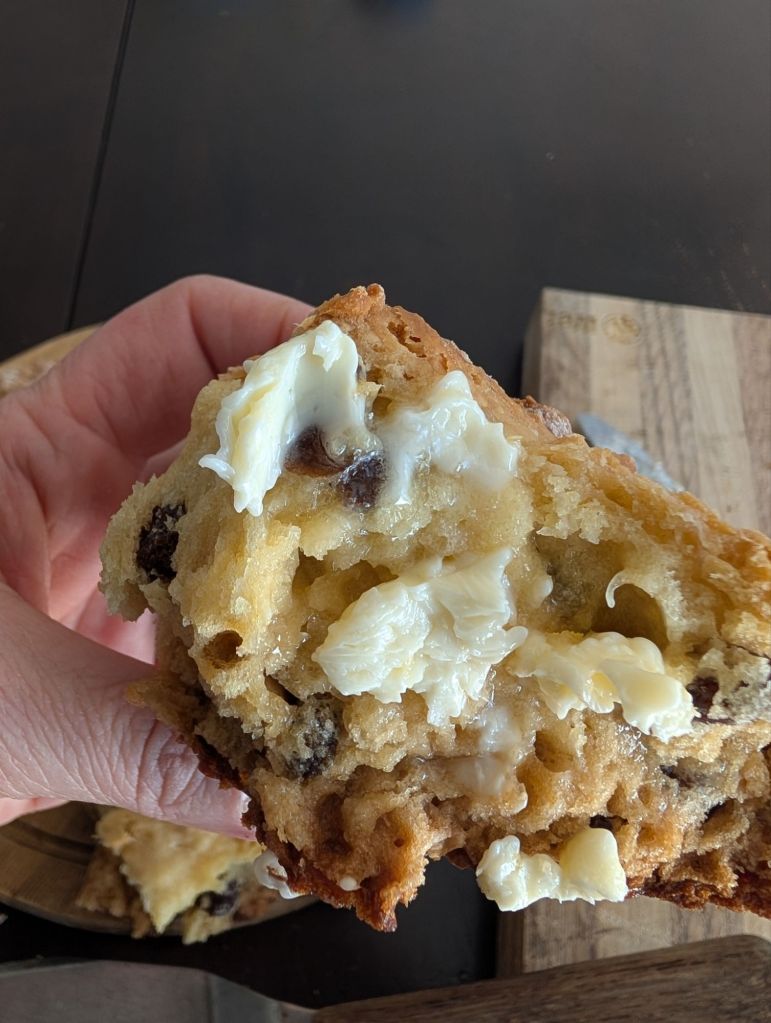
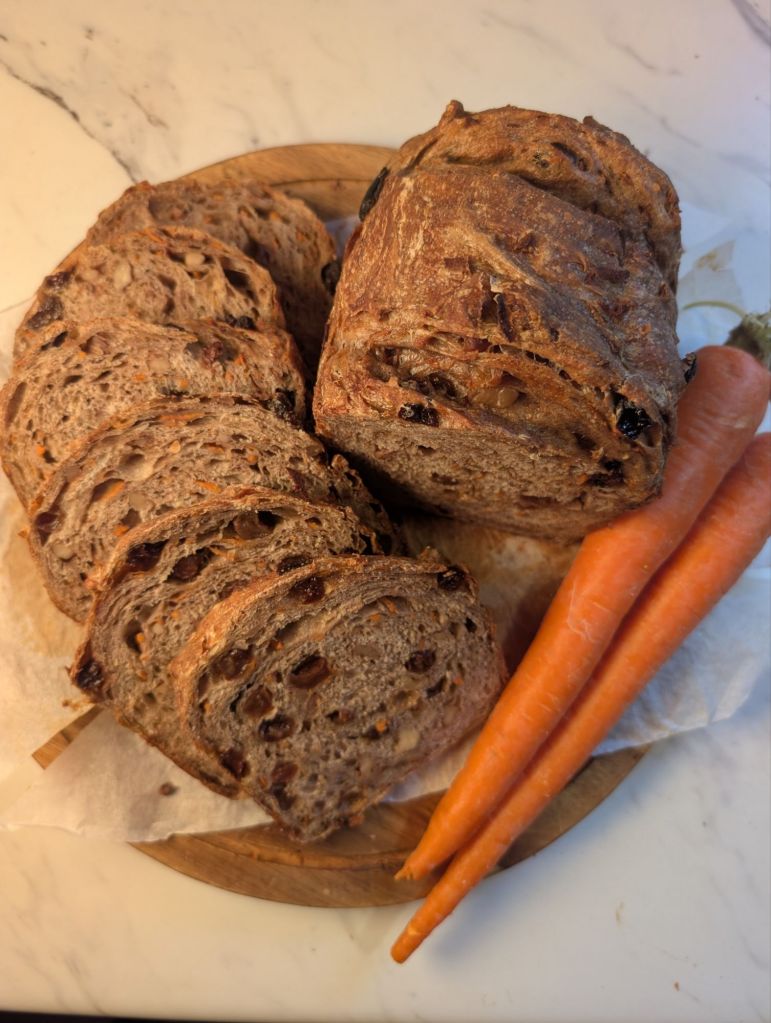
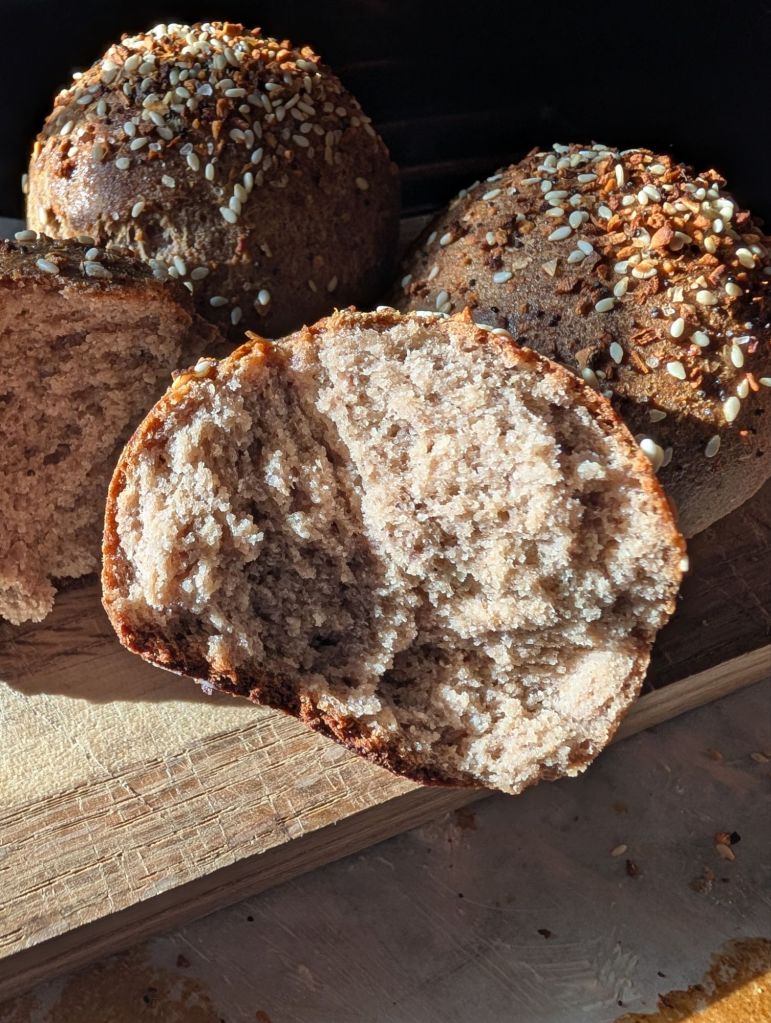
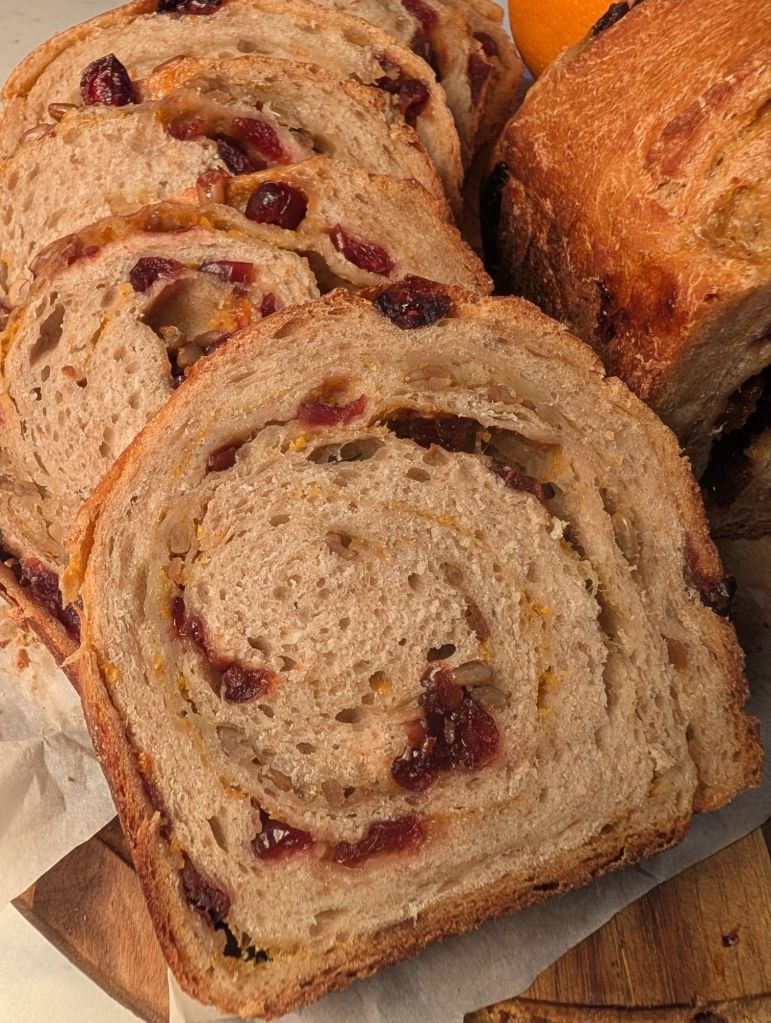
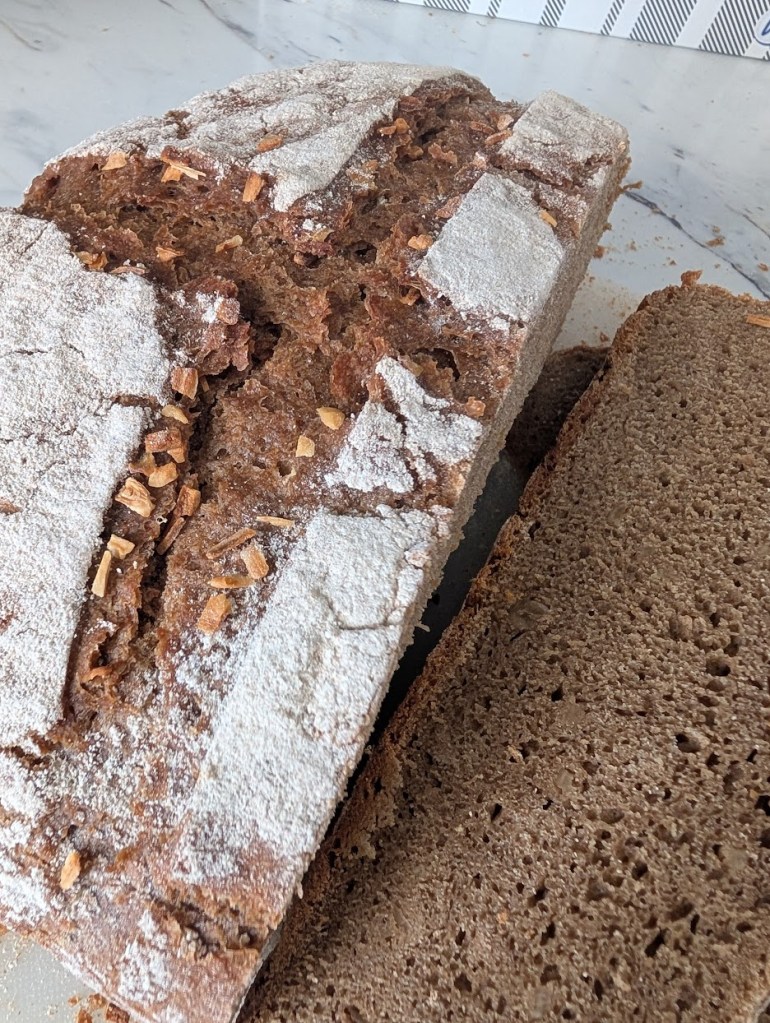
    14. Cool the sourdough bread on a wire rack for at least an hour before slicing. (If you don’t allow the bread to cool completely before slicing, it will be gummy and seem underbaked.

    Enjoy your freshly baked sourdough bread!

  • Onion Asiago Sourdough: The Loaf My Kids Were Mad I Gave Away


    I gave half the loaf to my uncle.
    My kids have not fully forgiven me for this and honestly I understand their position. This loaf was that good. The kind of good where you slice into it and everyone appears in the kitchen from wherever they were in the house, drawn in by the smell alone. Onion and asiago in a sourdough pan loaf sounds simple because it is simple. And sometimes simple is exactly the right answer.
    My uncle loved it. My kids loved it. And the half that stayed home didn’t last long enough to see the next morning. That’s the whole review right there.


    The asiago strategy.
    This is the detail that makes this loaf special and it takes about thirty extra seconds of effort. Chop some of your asiago into small chunks and grate the rest. The grated asiago melts completely into the dough during baking and gives you this deep, salty, cheesy flavour threaded through every single bite. The chopped pieces stay more intact and create these little molten cheese pockets — a gentle pull when you tear a slice that is completely unreasonable in the best possible way. Two textures, one cheese, one very good decision.

    The onion.
    No chopping, no crying, no standing over a pan for forty five minutes. The onion in this loaf is about as easy as it gets and it works beautifully. It rehydrates during the long bulk fermentation and distributes evenly through the dough giving you that sweet savoury onion flavour in every bite without any of the fuss of fresh onion. This is a weeknight loaf. A throw it together and walk away loaf. The kind of recipe that makes you look like you put in a lot more effort than you actually did.

    The Recipe


    Onion Asiago Sourdough


    9×5 pan loaf — straight starter method


    The Dough
    300g bread flour
    100g whole wheat flour
    315g water
    80g active starter
    20g olive oil
    9g salt


    The Inclusions (added at lamination)
    3 tbsp minced onion
    100g asiago — half grated, half chopped into small chunks


    The Method
    Mix all dough ingredients until no dry flour remains
    Rest covered with a damp towel for 45 minutes
    4 x stretch & fold every 30 minutes
    Cover with damp towel and bulk on the counter for 12 hours or until 50% risen
    Laminate — stretch dough flat, scatter minced onion and both asiago textures evenly across the surface, letter fold
    Shape into a tight cylinder and place seam side down in a greased 9×5 pan
    Cover and cold proof in the fridge for 12 hours
    Preheat oven to 425°F
    Pull dough straight from the fridge and score
    Cover and bake 40 minutes
    Uncover and bake a further 10-20 minutes until deep golden
    Pull at internal temp 200°F
    Cool at least 1.5 hours before slicing


    A few things worth knowing.
    The 12 hour counter bulk plus 12 hour cold proof gives this loaf serious flavour depth. The long slow fermentation develops the tang and the cold proof firms everything up so it holds its shape beautifully in the pan. Don’t rush either stage — the time is doing the work for you.
    Score confidently straight from the fridge — cold dough scores cleanly and the contrast between the cold dough and the hot oven is what gives you that beautiful oven spring.
    Cool it properly before slicing. The cheese needs time to set inside the crumb or you’ll lose those pockets on the cut and end up with a gummy middle. An hour and a half minimum. The loaf will still be warm. It will be worth the wait.


    The honest review.
    This is one of those loaves that doesn’t need much explaining. Onion and asiago in a long fermented sourdough pan loaf — the flavours are familiar and the result is deeply satisfying. My kids ate their half in one sitting and were genuinely annoyed that generosity existed as a concept when there was good bread involved.
    Make this on a day when you have time to let it do its thing. It will reward the patience.
    Just maybe make two loaves if you plan on sharing. Learn from my mistakes. 🧅🧀🍞

  • I Replaced The Water With Coffee and I Have Zero Regrets.
    I just wanted to see what would happen. I keep seeing these posts with people replacing the water in their loaves with sauce or beer or other weird things. I wanted to try it too, but I wanted to make something that was actually good.
    That’s genuinely the whole origin story of this loaf. No grand plan, no carefully researched technique, no Pinterest inspiration board. Just me standing at my counter looking at my sourdough setup and thinking — what if the water wasn’t water. What if it was coffee.
    So I made it coffee.
    And then I added toasted walnuts and brown sugar at lamination because I was already committed to the chaos and there was really no reason to stop there. And then the loaf came out and it was fantastic and also it needed something. So I made a coffee glaze and drizzled it over the top and that was the moment this went from a really good experimental loaf to something I will absolutely be making on repeat.
    Fair warning before we go any further. This loaf has caffeine. A meaningful amount of caffeine. It is an adults only situation and I say that with full sincerity. Plan your bake day accordingly.


    What replacing the water with coffee actually does.
    The coffee doesn’t make your sourdough taste like a coffee shop drink. It’s more subtle and more interesting than that. What it does is add this deep, slightly bitter, roasted undertone that runs underneath everything else in the loaf. It makes the whole thing taste more complex. More grown up. Like regular sourdough went on a trip somewhere and came back with a personality.
    The fermentation process actually mellows the coffee flavour slightly during bulk which means the final loaf is rich and nuanced rather than aggressively caffeinated tasting. The walnuts and brown sugar at lamination do the rest of the work — the sugar caramelises slightly during baking and the toasted walnuts add this buttery, earthy crunch that is completely at home next to the coffee dough.


    If you have ever eaten English coffee walnut cake — the classic British layered sponge with coffee buttercream and walnuts — this loaf is that energy translated into sourdough form. Nostalgic and deeply satisfying and the kind of thing that makes people close their eyes when they take the first bite.


    On the glaze.
    The loaf was fantastic without it. I want to be honest about that. But it needed something and I knew what that something was before I even finished the thought. Powdered sugar, instant coffee, a splash of milk and vanilla extract. Whisked until smooth and drizzled over the completely cooled loaf in that slow, dramatic way that makes for a very good video.
    The glaze sets into this thin, slightly crisp coffee shell on top of the crust that is genuinely one of the better things I have put on a loaf of bread. It concentrates the coffee flavour right at the surface so you get that hit immediately before the more subtle notes in the crumb follow behind. It takes five ingredients and about ninety seconds and it is the difference between a great loaf and an exceptional one.

    The Recipe

    Coffee Walnut Sourdough


    9×5 pan loaf — straight starter method


    The Dough
    300g bread flour
    100g whole wheat flour
    315g strongly brewed coffee, cooled to room temperature (replace water entirely)
    80g active starter
    30g brown sugar
    20g neutral oil
    1 tsp vanilla extract
    9g salt


    The Inclusions (added at lamination)
    100g toasted walnuts, roughly chopped
    30g brown sugar
    1 tsp cinnamon (optional but recommended)


    The Coffee Glaze
    80g powdered sugar
    2 tbsp strongly brewed espresso or 1 tsp instant coffee dissolved
    1 tbsp milk
    Pinch of salt


    The Method
    Brew your coffee strong and let it cool completely to room temperature before it goes anywhere near your starter — hot liquid will kill it
    Mix all dough ingredients until no dry flour remains. Rest 45 min
    4 x stretch & fold every 30 min
    Bulk until domed and jiggly — roughly 8-12 hrs

    Lamination — stretch dough flat, scatter toasted walnuts, brown sugar and cinnamon evenly across the surface, fold back in
    Shape into tight cylinder, place in greased 9×5 pan
    Cold proof overnight in the fridge
    Bake at 425°F — 20 min tented with foil, 18–20 min uncovered
    Pull at internal temp 200–205°F
    Cool completely before glazing
    Whisk glaze ingredients until smooth, drizzle over cooled loaf and let set before slicing ☕(Bonus points for extra toasted nuts on top)


    A few things worth knowing.
    Cool your coffee completely before it goes into the dough. I cannot stress this enough. Hot or even warm liquid added to a dough with active starter will damage the fermentation and you will end up with a flat, sad loaf that tastes like regret. Brew it the night before if you want to be safe. Room temperature only.
    Toast your walnuts. Four to five minutes in a dry pan over medium heat until they smell incredible. Raw walnuts inside bread taste flat and you deserve better than flat walnuts inside your very good coffee loaf.
    The brown sugar at lamination will make the dough feel slightly tacky and sticky as you fold it back in. That is completely normal and not a problem. Work with confidence and it will come together.
    And cool it fully before the glaze goes on. Fully. All the way. A warm loaf will swallow the glaze whole and you will lose that beautiful crisp coffee shell on top and that would be a tragedy. ☕


    The honest review.
    This is one of the best loaves I have made and I make a lot of loaves. The experiment worked in a way I genuinely did not see coming. One small decision — coffee instead of water — and the whole personality of the loaf changed completely.
    Make it on a weekend. Glaze it properly. Eat it with salted butter and a cup of coffee and try not to vibrate out of your chair.
    Adults only. You’ve been warned. ☕🥖

  • My neighbor asked if I could make her Irish soda bread for St. Patrick’s Day.
    And that was it. That was all she had to say. I was already mentally in my kitchen before she finished the sentence because that is just who I am and I have accepted it fully. Someone asks me to bake something and whatever I was doing before simply stops existing. It’s a gift. It’s also a problem. I’m at peace with both.
    Irish soda bread has always been one of those recipes I genuinely love making because it’s fast, it’s unfussy, and it tastes like something a grandmother made in a farmhouse kitchen a hundred years ago. Which is basically the highest compliment I can give a recipe. No levain build, no stretch and fold, no cold proof. You mix it, you shape it, you bake it, and an hour later your whole house smells like something is deeply right with the world.
    And this version uses sourdough discard which means you’re adding the benefits of some fermentation and making something beautiful at the same time. Multitasking at its finest.


    Why cold butter changes everything.
    Most Irish soda bread recipes have you melt the butter and mix it into the wet ingredients. That works fine. But cutting cold butter into the dry ingredients — the way you would for biscuits or pie crust — is the move that takes this from good to genuinely great.
    Here’s what happens. When you work cold butter into flour in small pieces and then bake it, those little pockets of butter melt in the oven and create these tender, slightly flaky layers in the crumb. The texture becomes more biscuit-like. More traditional. More the kind of thing you eat warm with salted butter and wonder why you don’t make it every single week.
    It takes an extra two minutes. It is worth every second of those two minutes.


    The discard.
    You can use active starter or discard for this recipe — both work. Discard will give you a slightly more pronounced tang which plays beautifully against the honey and raisins. Active starter gives a milder flavour. Either way the sourdough is doing two jobs here — adding flavour complexity and contributing to the rise alongside the baking soda. It’s not a traditional ingredient in Irish soda bread but once you add it you won’t be able to imagine it without.
    If you don’t have buttermilk on hand make your own. (Honestly I never buy buttermilk. I always just make mine) Add a tablespoon of apple cider vinegar to a cup of milk, give it a stir, and let it sit for five minutes. It won’t be quite as thick as real buttermilk but it will do the job perfectly and you can’t even tell the difference.

    The Recipe

    Sourdough Discard Irish Soda Bread


    Traditional round boule — serves 10-12


    Dry Ingredients
    2½ cups all purpose flour
    1 tsp baking soda
    1 tsp salt
    1 tbsp sugar


    Wet Ingredients
    1 cup buttermilk (or 1 cup milk + 1 tbsp apple cider vinegar, sit 5 min)
    ½ cup sourdough discard
    2 tbsp honey
    1 egg


    The Cold Butter
    4 tbsp cold butter, grated or cut into small cubes


    The Add In
    ¾ cup raisins (soaked in warm water 10 min, drained)


    The Method
    Preheat oven to 400°F
    Soak raisins in warm water while you get everything else together
    Whisk all dry ingredients together in a large bowl
    Grate the cold butter over the dry ingredients and work them in with your fingertips
    In a separate bowl whisk buttermilk, discard, honey and egg together
    Pour wet into dry and mix until just combined — shaggy and rough is exactly right, do not overmix
    Drain raisins, pat dry, fold in gently
    In order to handle it as little as possible, I use a bowl scraper and dump mine out right onto a parchment lined sheet pan, keeping it in a dome shape
    Score a deep X across the top with a sharp knife or scissors (I often find the dough is too shaggy to use a knife and kitchen scissors are my best bet)
    Bake 45–55 min until deep golden — tent with foil after 30 min if the top is darkening too fast
    Internal temp 190–195°F
    Cool on a wire rack at least 20 min before slicing


    A few things worth knowing.

    Do not overmix. I cannot say this enough. Irish soda bread rises from the reaction between the baking soda and the acid in the buttermilk and discard — not from gluten development. The more you work the dough the tougher the crumb gets. Mix until it just comes together, lumps and all, and stop. Shaggy is your friend here.
    Soak the raisins. Dry raisins going straight into the dough will steal moisture and leave you with dry, dense pockets. Ten minutes in warm water makes them plump and jammy and they distribute through the crumb in a way that dry raisins simply don’t.


    Score the X deep. Not a decorative little scratch — a real, confident, deep score that goes almost all the way through. It’s traditional, it helps the bread bake evenly through the centre, and it looks exactly right on a rustic round boule.
    Cool it before you cut it. I know. I know it’s hard. Especially when your kitchen smells the way it smells when this comes out of the oven. Twenty minutes minimum. The crumb needs to set or it’ll be gummy in the middle and you’ll be sad.


    The honest review.
    My neighbor got her Irish soda bread. I, of course, made a mini one for myself and ate the entire thing over the sink with a tab of melted butter. No regrets. None at all.
    Make this for someone you love. Or make it for yourself and eat it warm from the oven standing at the counter with salted butter.
    Both are equally valid. 🍀🧈


  • I was tired.
    Not tired in a dramatic way. Just tired of making the same loaf the same way and getting the same result. The carrot cake sourdough has always been a good loaf. Reliable. Crowd pleasing. The kind of thing you bring to Easter dinner and people ask for the recipe.
    But I wanted more from her.
    So I added a tablespoon of Dutch process cocoa into the flour before mixing and honestly I don’t know why it took me this long. One tablespoon and the whole loaf leveled up.

    The smell alone.
    I need to talk about the smell because it hit different this time. Allspice, brown sugar, carrot, vanilla — and underneath all of it this deep warm cocoa note that made my whole kitchen smell like a bakery crossed with a spice market. My kids wandered in one by one like cartoon characters following a scent trail. That smell is what happens when cocoa meets warm spice in a fermented dough and it is completely unreasonable in the best possible way.

    The glaze.
    Cream cheese, powdered sugar, a splash of milk, vanilla. Whisked until smooth and drizzled over the completely cooled loaf. It sets into this thin barely there sweetness that ties the whole thing together without overwhelming the spice. Do not skip it. I totally skipped it this time and I deeply regret it. Do not cut the loaf before it sets. I know it’s hard. Wait anyway.

    The honest review.
    This is a dream loaf. I don’t say that about everything. The crumb is soft and loaded with carrot and nut and raisin pockets. The crust has this deep, spiced, slightly chocolatey note that hits you before you’ve even taken a bite. The cream cheese glaze on top makes it feel like an actual dessert that also happens to be sourdough. And the smell. I keep coming back to the smell. Your whole house will thank you.
    One tablespoon of cocoa. That’s the whole secret. Sometimes the smallest thing changes everything.

    Carrot Cake Sourdough

    9×5 pan loaf
    The Dough
    300g bread flour
    100g whole wheat flour

    1 tbsp cocoa powder
    315g water
    80g active starter
    30g honey or brown sugar
    20g olive oil
    9g salt
    1 tsp vanilla


    The Inclusions (folded in during stretch & fold)
    120g finely grated carrot (squeezed)
    60g toasted pecans or walnuts
    50g raisins (soaked & drained)
    1–1.5 tsp allspice


    The Cream Cheese Glaze
    ½ cup cream cheese, softened
    ½ cup powdered sugar
    2–3 tbsp milk or cream
    ½ tsp vanilla
    Whisk until smooth and drizzle over fully cooled loaf. 🥕🍞

    The Method
    Mix 1 tbsp Dutch process cocoa into flour before adding any liquid
    Add water, starter, brown sugar, oil, vanilla and salt. Mix until no dry flour remains. Rest 45 min
    4 x stretch & fold every 30 min
    Fold in grated carrot, toasted nuts, soaked raisins and allspice during stretch & fold
    Bulk until domed and jiggly — roughly 12 hrs
    Shape into tight cylinder, place in greased 9×5 pan
    Cold proof overnight in the fridge
    Score and bake at 425°F — 50ish min covered, 10 min uncovered
    Pull at internal temp 200–205°F
    Cool completely before glazing
    Whisk glaze ingredients until smooth and drizzle over cooled loaf 🥕🍫🍞

  • I hid the Oreos.
    I genuinely hid them in the corner of my clutter counter behind a couple of brown bananas the basket of spices that are too big to fit in the spice rack. I thought I was being clever. My husband found them within eight hours and saved just enough for me to still make this loaf. I don’t know whether to be impressed or annoyed. Both. It’s both.
    Then my kids discovered the gummy worms while I was working and picked through the bag with the quiet, focused energy of people who absolutely know what they’re doing and are hoping you won’t notice. This is what happens when you don’t buy sugary processed treats very often. They become a full family event. Apparently sourdough ingredients are fair game now.
    Anyway. I still made the loaf. And it is completely unhinged and I love it.


    Let’s talk about what this actually is.
    Dirt pudding sourdough is exactly what it sounds like. Chocolate cocoa dough, instant chocolate pudding mix stirred in dry, crushed Oreos and dark chocolate chunks folded in at lamination, frozen gummy worms added last. Cream cheese frosting on top with more crushed Oreos and worms poking out dramatically for the photo. It tastes like a childhood birthday party and a sourdough loaf had a baby and genuinely could not be more chaotic.
    The pudding mix was the decision that took this from chocolate sourdough to actually dirt pudding in loaf form. You add it dry — don’t make the pudding first, just tip the powder straight into your flour with the cocoa before you mix. What it does is extraordinary. The cornstarch in the mix tenderises the gluten and gives you this soft, pillowy, almost cake-like crumb that stays moist for days. It deepens the chocolate flavour without you having to add more cocoa. The whole thing tastes genuinely indulgent in a way that plain chocolate sourdough just doesn’t quite hit.

    Baking cocoa, chocolate Jell-O, Oreos, frozen gummy worms, chocolate chunks


    The gummy worm situation.
    This is the part that requires actual strategy and I say that completely sincerely. Room temperature gummy worms will dissolve almost entirely during the bake. You will end up with coloured sugar pockets and no worms and you will be sad. Freeze your gummy worms for at least two hours before they go anywhere near your dough. Frozen worms hold their shape, give you actual visible pieces in the crumb, and make the whole thing look as unhinged as it tastes.
    For the worms on top — press them in right before baking, not after shaping. They firm up in the oven and hold their position for the photo which is ultimately what all of this is for anyway. Let’s be honest.

    Dirt Pudding Sourdough Recipe


    9×5 pan loaf — straight starter method


    The Dough
    300g bread flour
    100g whole wheat flour
    315g water
    80g active starter
    30g honey
    20g neutral oil
    1 tsp vanilla extract
    9g salt
    25g Dutch process cocoa (mixed into flour before adding water)
    34g instant chocolate pudding mix (dry, mixed into flour)


    The Inclusions (added at lamination)
    80g Oreos, roughly crushed (keep some filling intact)
    60g dark chocolate chunks
    30g gummy worms, cut in half (freeze for 2+ hours first)


    The Topping (before baking)
    Crushed Oreos pressed into the top
    2–3 gummy worms pressed in dramatically
    The Cream Cheese Frosting
    ½ cup cream cheese, softened (4oz block)
    ½ cup powdered sugar
    2 tbsp milk
    1 tsp vanilla
    2 tbsp crushed Oreos stirred through


    The Method
    Mix cocoa and pudding mix into flour before adding any liquid
    Add water, starter, honey, oil, vanilla and salt. Mix until no dry flour remains. Rest 45 min
    4 x stretch & fold every 30 min
    Bulk rise on counter for 24 hours (for cold kitchens)
    Laminate frozen worms, crushed Oreos and chocolate chunks straight after bulk
    Press Oreos and gummy worms into the top
    Bake immediately — no cold proof needed
    Bake at 425°F covered for 1 hour, then uncovered for 10 min
    Pull at internal temp 200°F
    Cool completely before frosting
    Spread cream cheese frosting over cooled loaf, top with crushed Oreos and gummy worms 🪱🍫


    The process.
    Same sweet base dough I use for everything — bread flour, whole wheat, water, active starter, honey, oil, vanilla, salt. Before you mix anything, combine your cocoa powder and dry pudding mix straight into the flour. This is important — you want it fully incorporated before the water goes in so it hydrates evenly and doesn’t streak.
    Mix, rest forty five minutes, four sets of stretch and fold every thirty minutes. The dough will feel slightly stickier than usual because of the cornstarch in the pudding mix. That is completely normal. Do not add more flour. Trust the process.

    Bulk until domed and jiggly. The cornstarch will slow things down slightly so give it an extra few hours compared to your usual bulk time and go by feel rather than the clock.


    At lamination — stretch the dough out flat, scatter your roughly crushed Oreos across the surface. Rough chunks, not fine crumbs. You want actual Oreo pieces showing up in the crumb, not just darkness. Scatter dark chocolate chunks on top. Add your frozen gummy worms last, cut in half so they distribute more evenly. Fold everything back in gently and try not to think too hard about what you’re doing.


    Shape into a tight cylinder, into your parchment lined 9×5 pan. Bake at 425°F, twenty minutes covered, eighteen to twenty minutes uncovered. Pull at 200°F internal — not 205°F, the chocolate and Oreos add enough moisture that you don’t need to push it further.


    Cool it completely before the frosting goes on or it will slide straight off and you’ll be upset.


    The frosting.
    Cream cheese, powdered sugar, a splash of milk, vanilla, and crushed Oreos stirred through. Spread it over the cooled loaf, top with more Oreo crumbs and as many gummy worms as your family hasn’t already eaten. The contrast of the dark chocolate loaf against the cream cheese frosting with worms on top is genuinely one of the most chaotic and photogenic things I have ever put on my counter.


    A few tips.
    Freeze the worms. I cannot say this enough. Hide the Oreos better than I did — maybe a locked car, maybe a safety deposit box, use your judgement. Keep some of the Oreo filling intact when you crush them because the cream melts into the dough and adds a sweetness that is completely unreasonable. Pull at 200°F not 205°F. And do not skip the cream cheese frosting because this loaf deserves to fully commit to the bit.
    This is the most chaotic thing I have made and I bake gummy worms into sourdough now apparently.
    No notes. 🪱🍫

  • Seven months postpartum with my fourth baby and I have decided I am ready. Not ready in a dramatic, overhauled-my-entire-life way. Just ready to start making choices that feel good again. And for me that starts in the kitchen because the kitchen is where I live anyway.


    I have always baked the old school way. AP flour, sourdough starter, proper gluten development, the whole thing. Low carb baking felt like a compromise I wasn’t willing to make. Cardboard textures and sad dense pucks dressed up as bread. No thank you.


    And then I found vital wheat gluten and everything changed.

    9 simple ingredients


    Let me tell you about this dough.
    It is nothing like anything I have ever worked with. I want to be upfront about that so you’re not standing at your counter at 9am panicking. When you first mix it, it’s wet. It doesn’t want to stay together. It looks like a mistake. It feels like a mistake. Keep going.

    After kneading for 3 minutes


    Because then something happens. You start kneading and the gluten develops and the whole thing transforms. It gets stiff. Almost heavy in your hands. Elastic in a way that almond flour dough has absolutely no right to be. It holds together. It shapes. It becomes something you can actually work with.
    That moment is when I knew this recipe was different.


    What’s actually in it.
    The base is superfine almond flour and vital wheat gluten — and the vital wheat gluten is the entire point. This is what commercial low carb breads use to get actual bread texture. At around 3g net carbs per two tablespoons it stays very keto friendly but it gives you genuine chew and structure that almond flour alone simply cannot deliver. Psyllium husk powder binds everything together, baking powder gives a little lift, and a teaspoon of instant yeast goes in dry. The yeast doesn’t do a huge amount of leavening here but what it does do is give you that authentic bready depth of flavour that low carb recipes almost always lack. It’s the difference between something that tastes like a bread substitute and something that just tastes like bread.
    The wet ingredients are eggs, olive oil, apple cider vinegar, and warm water. Not boiling — warm. The gluten needs gentle hydration or it tightens up before you’ve had a chance to work with it.

    Egg wash and everything seasoning. Ready for oven.

    The Better Recipe: Almond Flour + Vital Wheat Gluten Kaiser Rolls
    Vital wheat gluten is the move. It’s what gives commercial “low carb” breads their real bread texture, and at ~3g net carbs per 2 tbsp it’s still very keto-friendly. Combined with almond flour and psyllium, you get genuine chew and spring.

    Low Carb Rolls

    Dry Ingredients

    Ingredient Amount
    almond flour1½ cups
    vital wheat gluten½ cup
    psyllium husk powder2 tbsp
    baking powder1 tsp
    instant yeast (optional but adds authentic flavor and a tiny bit of rise)1 tsp
    salt1 tsp
    sugar (just to feed the yeast — burns off completely)1 tsp


    Wet Ingredients

    IngredientAmount
    large eggs3
    olive oil1 tbsp
    apple cider vinegar2 tsp
    warm water ½ cup


    Method:

    Preheat oven to 375°F.
    Whisk dry ingredients together.
    Beat eggs, oil, vinegar, and warm water, then mix into dry ingredients.
    Knead the dough for 2–3 minutes — the gluten will actually develop and you’ll feel it get slightly elastic. This is what you want.
    Rest the dough 10 minutes (gluten relaxes, easier to shape).
    Divide into 4 balls, shape into round rolls, and score the tops with scissors or a blade in a star/cross pattern.
    Optional: let rest another 20 min before baking for slightly better rise.
    Brush with egg wash, add everything bagel seasoning or sesame seeds, bake 35–40 min.
    Cool fully before cutting — at least 30 min.
    Net carbs: ~4–5g per roll

    The yeast is optional but worth including — even though it doesn’t do much leavening here, it adds that authentic bready flavor that almond flour recipes often lack.


    How it bakes.
    I was going for a kaiser. Light, fluffy, domed, the whole vision. What I got was something closer to a dense wheat dinner roll and honestly I’m not mad about it at all. The crumb is tight and substantial. The crust has a genuine depth to it. The flavour is complex in a way I did not expect from a low carb recipe — rich, slightly nutty from the almond flour, with that yeasty bready note underneath everything.
    And the everything bagel seasoning on top. That was the decision that made these fabulous. The seeds toast beautifully in the oven and the salt and garlic hit you before you’ve even taken a bite. Do not skip it. Do not substitute it. Everything bagel seasoning on top is non negotiable.


    A few things I learned.
    The dough being wet at first is not a problem. Knead through it and trust that it will come together. Two to three minutes of real kneading — not stirring, actual kneading — and you will feel it change under your hands. Rest it for ten minutes after that to let the gluten relax and it will be significantly easier to shape.
    Score the tops with scissors or a blade in a star or cross pattern before baking. It gives you that kaiser look and helps them open up in the oven. Brush with egg wash generously — it’s what gives you that deep golden crust. Cool for at least thirty minutes before cutting or the crumb won’t have set properly and you’ll be disappointed.
    Net carbs are around four to five grams per roll. Four rolls per batch. Easy math.


    The honest review.
    These are not a light fluffy kaiser roll. I want to be straight with you about that because I went in expecting one thing and got another and the adjustment took about thirty seconds. What they are is a dense, chewy, flavourful roll with a genuinely satisfying bite that holds up to whatever you put in it. Burger. Sandwich. Eaten warm straight from the oven with butter while standing at the counter seven months postpartum choosing yourself again.
    That last one is my personal recommendation.
    I’m not mourning AP flour anymore. Not even a little. 🥖


  • This one is bright, a little tart, deeply fragrant, and somehow manages to feel both cosy and fresh at the same time. It’s the loaf you make when you want to feel like you have your life together. Which, for the record, I do not. But the loaf does. And that counts for something.


    Let’s talk about the orange zest.
    This is the step most people skip and it’s the reason most citrus sourdoughs taste flat. Before that zest goes anywhere near your dough, you need to sugar it. Zest your orange directly onto a tablespoon of sugar and rub them together with your fingertips for about a minute until the sugar turns orange and smells incredible. What you’re doing is breaking down the zest and releasing all the essential oils — the good stuff. The flavour stuff. Skip this and you get a hint of orange. Do this and you get the whole thing.
    Let it sit for ten minutes while you get on with your dough. It makes a difference.

    Roll up the dough after lamination


    The process.
    This loaf uses the same sweet base dough I use for most of my enriched sourdoughs — bread flour, whole wheat, water, active starter, a little honey, olive oil, salt, and vanilla. Mix it, rest it, stretch and fold four times over two hours.
    Then comes lamination and this is where the magic happens. Stretch your dough out flat on a lightly wet surface until it’s thin enough to almost see through. Scatter the sugared orange zest evenly across the whole surface. Add your cranberries and sunflower seeds on top. Then squeeze half an orange directly over everything — that fresh hit of juice adds a punch of citrus that you simply cannot get from zest alone. Fold the dough back over itself like a letter, then fold again. What you’re left with is these beautiful ribbons of orange and cranberry swirled through the dough that show up stunningly in the crumb when you slice it.
    Roll up the dough after laminating like a letter to tighten everything back up and you’re done.
    Drop it into a parchment lined or greased 9×5 pan, and cold proof overnight( the cold proof is optional, but adds flavor and ferment).
    Bake at 425°F. Cover for the first thirty minutes — the honey in the dough means it catches colour fast. Pull the cover, bake another eight to ten minutes until it’s deep golden and hits 200 to 205°F internally.
    Cool it. Fully. I know. It’s hard. Do it anyway.

    Use kitchen scissors to score before baking
    Beautiful right out of the oven


    The glaze.
    Powdered sugar, fresh orange juice, a little zest. Whisk until smooth, drizzle over the completely cooled loaf. It sets into this thin, slightly crisp citrus glaze that takes the whole thing from really good sourdough to something you’d genuinely be proud to put on a table in front of people.

    Cranberry Orange Sunflower Sourdough Recipe

    9×5 pan loaf — straight starter method

    The Dough

    300g bread flour

    100g whole wheat flour

    315g water

    80g active starter

    30g honey

    20g neutral oil

    1 tsp vanilla

    9g salt

    The Inclusions (added at lamination)

    120g frozen cranberries (don’t thaw)

    60g toasted sunflower seeds

    Zest of 2 oranges (sugared first)

    ½ orange squeezed fresh

    The Glaze

    80g powdered sugar

    2 tbsp fresh orange juice

    1 tsp orange zest

    The Method

    Mix all dough ingredients until no dry flour remains. Rest 45 min

    4 x stretch & fold every 30 min

    Lamination — stretch dough flat, scatter sugared zest, cranberries and sunflower seeds across the surface, squeeze orange juice over everything, fold back in

    One more stretch & fold 30 min later to tighten up

    Bulk until domed and jiggly — roughly 5–6 hrs

    Shape into a tight cylinder and place in a greased 9×5 pan

    Cold proof overnight in the fridge

    Bake at 425°F — 20 min tented with foil, 18–20 min uncovered

    Pull at internal temp 200–205°F

    Cool fully before glazing

    Whisk glaze ingredients until smooth and drizzle over cooled loaf 🍊🌻


    A few tips before you go.
    Toast your sunflower seeds first in a dry pan for four to five minutes until golden and fragrant — raw seeds inside bread taste flat and you deserve better than that. Sugar the zest every single time, no exceptions. Squeeze that fresh orange juice over your lamination — it’s the detail that takes this loaf from good to actually memorable. Soak your dried cranberries if that’s the route you’re going. Don’t rush the cool before you glaze or it will slide straight off and pool at the bottom and you’ll be upset. And don’t panic if the crumb looks pink or blush — that’s the cranberries doing their thing and it is exactly right.


    This loaf is bright and a little chaotic and somehow pulls itself together beautifully in the end.


    Relatable, honestly. 🍊

  • Imagine rich buttery poundcake and fresh zesty lemons for a perfectly soft, melt in your mouth cookie. They barely lasted 24 hours in my house, and they are such a simple bake! These cookies have an irresistible sweet glaze, leaving you wanting another!

    Prep Time : 15 minutesTotal Time : 25 minutes
    Cook Time: 10-12 minutesYield: 28-30 cookies

    These cookies have the perfect texture, moist and chewy on the inside and slightly crisp on the outside. Combine that with the richness of the buttery poundcake and the brightness of the fresh lemon to make these cookies irresistible!

    Why will you love these Lemon Poundcake Cookies?

    • They melt in your mouth
    • They are simple to bake
    • They are rich yet fresh
    • They are perfect paired with coffee or tea
    • They are pretty!

    Tip: Be sure to zest the lemons before you juice them! It is much easier to zest a whole lemon.

    How to eat these Lemon Poundcake Cookies?

    You can serve these with tea or coffee. (I love them with a cup of Earl Gray Tea) They also go great with milk or just as a stand alone they are amazing! These cookies are perfect for snacking and sat on my counter for less than a day because everyone ate them up!

    How to store Lemon Poundcake Cookies?

    Once cooled, store in an airtight container for up to 5 days (although I doubt they will last that long!) You can freeze baked cookies or dough for up to 3 months.

    Irresistible Lemon Poundcake Cookies Recipe

    These delightful lemon cookies are perfect for any occasion, providing a burst of citrus flavor in every bite!

    Ingredients

    • Cookies
      • 1 cup softened unsalted butter
      • 1 cup granulated sugar
      • 1 large egg
      • 2 lemons (zested and juiced)
      • 2 1/2 cups all-purpose flour
      • 1/2 teaspoon baking powder
      • 1/4 teaspoon salt
      • 1/2 teaspoon vanilla extract
    • Glaze
      • 1 cup powdered sugar
      • 2 tablespoons lemon juice (1 lemon juiced)
      • Lemon zest for garnish

    Instructions

    1. Preheat the oven to 350°F (175°C) and line a baking sheet with parchment paper.
    2. In a large bowl, cream together the softened butter and granulated sugar until light and fluffy.
    3. Beat in the egg, vanilla, lemon juice, and lemon zest until well combined.
    4. In a separate bowl, whisk together the flour, baking powder, and salt. Gradually add the dry ingredients to the wet ingredients, mixing until just combined.
    5. Drop tablespoons of dough onto the prepared baking sheet, spacing them about 2 inches apart.
    6. Bake for 10-12 minutes, or until the edges start to turn golden.
    7. While the cookies are baking, prepare the glaze by mixing the powdered sugar and lemon juice in a bowl until smooth (be sure to remove any pulp or seeds from the juice for a smooth glaze).
    8. Once the cookies are done, let them cool on the baking sheet for a few minutes before transferring them to a wire rack to cool completely.
    9. Drizzle the lemon glaze over the cooled cookies and sprinkle with lemon zest for garnish.
    10. Enjoy your lemon cookies with a cup of tea or coffee!

    Storage

    Store the cookies in an airtight container at room temperature for up to 5 days. You can also freeze them for up to 3 months for future enjoyment.

    FAQ

    Can I substitute the eggs?

    Yes, the eggs can be substituted for many different things. The texture may be a bit different but you could use 1/4 cup of plain or soy yogurt. You could also use ground flaxseed or silken tofu.

    Can I use bottled lemon juice instead of lemons?

    Yes, of course you can. This will slightly change the flavor though and the cookies will not taste as lemony fresh (some also may contain preservatives and other ingredients).

    Can I make the dough ahead of time?

    Yes you can! This dough will keep well for up to 3 days in the fridge when stored in an airtight container and will still taste super fresh!

    Can I double this recipe?

    Yes, you absolutely can! No need for any alterations, just double the ingredients!

  • 🌾🍞How to Bake the Best Sourdough Rye Bread

    This artisan rye is made mostly with whole-grain rye flour for an extraordinary malty and flavorful loaf of bread. Perfect for open-faced sandwiches or smothered with spinach dip, it’ll be an instant favorite and a new staple in your baking rotation.

    A good New York deli rye will always be my favorite bread. It makes for the best sandwiches with fresh garden tomatoes, it’s a great vehicle for spinach dip, and it is the best buttered toast to go alongside eggs and chipped beef.

    Naturally, I wanted to create a gut healthy sourdough rye that resembled that amazing New York deli rye of my childhood. This wholegrain sourdough rye bread boasts that hearty rye flavor with a crunchy crust and an onion accent that will keep you going back for more.

    How is rye flour different than wheat flours?

    If you are new to using rye flour, here are a few tidbits of information on using it to make rye sourdough bread.

    • Breads baked with rye flour will be a bit more dense than bread made with whole wheat flour, so we add 10% of a high protein flour like bread flour or all purpose flour to lighten the loaf a bit.
    •  Sourdough bread made with rye will ferment faster because micronutrients in rye flour encourage fermentation.
    • You need to use a preferment (levain) because sourdough rye bread has a high acidity and low PH.

    Rye dough will feel very wet and much stickier compared to working with high gluten flours (all purpose and bread flours). This is normal, and you shouldn’t worry!– Wet your hands before mixing to avoid the dough sticking to your hands. Knowing this before making this recipe is important.

    What is rye?

    Rye flour is milled from rye berries just as wheat is milled from wheat berries. It has a nutty, earthy and malty flavor and is categorized by how much of the rye kernel is in the ground flour (endosperm, bran and germ). Pumpernickel is actually the darkest type of rye flour and contains all of the ground up rye berry.

    Is Rye healthy?

    Yes! Rye naturally has less gluten than wheat, and the fermentation breaks down the gluten even more, so for those with gluten sensitivities, rye is a great choice. Rye has a higher nutrition profile than wheat, and has more soluble fiber.

    Baker’s Timeline
    7:00 pmMake the levain
    7:00 am (the next morning)Mix and bulk ferment
    7:30 amShape and proof
    8:30 amBake

    Do I need the levain?

    The levain, also known as preferment, is definitely going to help this recipe to be the best it can be. If you skip the preferment, then you might get a gummy layer between your crust and crumb. You need the levain to be ripe in order to properly acidify the rye in order to avoid a gummy bread. The levain also will deepen the flavor creating a better flavor profile.

    Ingredients:

    Levain

    • 270g whole rye flour
    • 270g water
    • 40g active sourdough starter at 100% hydration

    Dough

    • 270g whole rye flour
    • 60g bread flour or all purpose flour
    • 270g water
    • 12g fine sea salt
    • 1 tbsp black strap molasses
    • 2 tbsp dried onion flakes
    • the levain

    Instructions

    1. Prepare the levain – 7:00 p.m.
      Mix the Levain ingredients in a medium bowl and leave them covered with a lid or plastic wrap at a warm room temperature, 72-76°F, to ferment overnight.
    2. Mix – 7:00 a.m. (the next morning)
      Use warm mixing water (80-85°F). Place the flour, water, salt, molasses, onion flakes and levain in a large bowl. We your hands as the dough is very sticky, or use a dough whisk, mix thoroughly. Shape the dough into a ball in the center of the mixing bowl.
    3. Bulk fermentation – 7:15 a.m.
      At a warmish room temperature, 72-76°F, bulk fermentation should take 20-45 minutes.Cooler temperatures may take longer. The dough should rise about 25%.
    4. Shape – (after bulk ferment)
      Prepare a banneton basket with a tea towel and generously dust with rye flour (this dough is very sticky!). Scrape the dough out onto a well floured work surface. Now you will perform one set of stretch and folds (light on the stretch). To do this, imagine there are 4 sides to the dough, fold one side of the dough over to about the middle. Then fold each side over to the middle until you have a square shape. Now flip the dough over and use your hands to shape it into a ball again. Scoop up the dough and place it seam-side-down into the prepared proofing basket. Dust the top of the dough with more whole rye flour. Cover the basket with plastic wrap, beeswax or place into a plastic shopping bag to proof for an hour or so.
    5. Proof – (1-2 hours)
      At room temperature, this rye sourdough bread should take 1 hour to proof (in the colder months or if your kitchen is cool, it may take 2 hours).
    6. Bake
      Preheat a Dutch oven at 450°. Once preheated, place a piece of parchment paper on top of the dough and flip it over seam side down. You can score the dough if you like, or allow it to naturally crack for a more rustic look. Top with more onion flakes if desired, and place into the preheated Dutch oven with the lid on. Bake for 30 minutes, then remove the lid and lower the temperature to 400°. Bake without the lid for an additional 20-25 minutes. You will know it is done when the crust is a deep golden brown and a knock to the bottom sounds hollow. Let the bread cool on a wire rack for an hour or longer, until completely cool. Place in a plastic or paper bag for and wait 24 hours before slicing (we have never once been able to wait the full 24 hours!)

    Since sourdough is naturally fermented, the bread will last a bit longer than other breads that don’t use preservatives. To get the most out of your sourdough rye bread, store in an airtight container and it will last for 4 days. You can also freeze for up to 3 months.

    FAQ

    Why is my sourdough rye bread gummy?

    You probably cut the bread too early or did not allow the levain to ripen for enough time. Make sure you allow 12 hours for the levain to ripen and after baking the bread should be fully cooled, preferably for 24 hours.

    Do I need a Dutch Oven?

    No, not necessarily. You can use a pizza pan and “steam” the bread during the initial 30 minute bake by spraying with a spray bottle filled with water. You could also use a loaf pan or other oven-proof vessel.

    Why is the crust separating from the bread?

    If your top crust or “flying crust” is separating from the rest of your loaf, then your dough was either too hydrated or your levain was not ripe enough. Be sure to allow 12 hours in a warm room to fully ripen.

    Is rye sourdough good for gluten intolerance?

    Although rye sourdough is naturally low in gluten, and the fermentation process breaks down even more gluten, it is not gluten free. It is better than typical breads for gluten intolerance.

  • 🫐🧁Homemade Cheesecake with Blueberry Topping

    This cheesecake is a very very old family recipe. Its similar to a New York Cheesecake, but it’s even creamier and smoother!

    Homemade Cheesecake with Blueberry Topping

    I define a good cheesecake is creamy and moist, but slightly dense, similar to a New York Cheesecake. You can add all kids of toppings or crusts to change the variety, but the base is always the same. Good quality cream cheese (Philadelphia brand), eggs, sugar, and vanilla. It is important to have all ingredients at room temperature, so everything combines well. Cheesecake is an art and a science, and can be difficult to master. From my 20 years of baking experience and family “secrets” passed down to me, I can help you to bake a delicious cheesecake!

    Tips and Tricks

    All of your ingredients should be room temperature. This is important so everything combines well.

    You need to use a springform pan. This is so you can release your cheesecake from the pan so you are able to serve it.

    You should bake it in a water bath. This keeps the top from cracking. If your top does crack, don’t worry too much because you can always cover it with the topping.

    The cheesecake needs to sit in the oven for 1-2 hours after it is done baking. This allows for the temperature to slowly come down and avoid cracking.

    When it is done baking, the sides should be set and the middle should be slightly jiggly.

    It should sit in the fridge overnight or for 5-6 hours minimum. It needs to set.

    Creamy Cheesecake with Fresh Blueberry Topping

    This recipe takes the classic New York Cheesecake up a notch, making it even creamier and smoother. It’s a real treat for any special occasion, and everyone will love it.

    Homemade Cheesecake with Blueberry Topping

    Ingredients:

    • 1 1/2 cups graham cracker crumbs
    • 1/4 cup granulated sugar
    • 1/2 cup unsalted butter, melted
    • 4 packages pf Philadelphia cream cheese, room temperature
    • 1 1/4 cups sugar
    • 1 teaspoon pure vanilla extract
    • 4 large eggs, room temperature
    • 1 cup fresh blueberries
    • 1/4 cup granulated sugar
    • 1/4 cup water
    • 1 tablespoon lemon juice

    Instructions:

    1. Prepare the Crust:
      • Preheat the oven to 325°F (163°C).
      • In a mixing bowl, combine the graham cracker crumbs, 1/4 cup sugar, and melted butter. Press the mixture into the bottom of a 9-inch springform pan. Bake for 10 minutes, then set aside to cool.
    2. Prepare the Filling:
      • In a large bowl, beat the cream cheese, 1 1/4 cups sugar, and vanilla extract until smooth.
      • Add the eggs one at a time, mixing well after each addition.
    3. Bake the Cheesecake:
      • Pour the filling over the cooled crust. Place the springform pan in a larger roasting pan and fill the roasting pan with boiling water until it reaches halfway up the sides of the springform pan.
      • Bake for 55-60 minutes, or until the center is set and the edges are slightly puffed.
      • Turn off the oven and let the cheesecake cool in the oven for 1-2 hours with the door cracked.
    4. Prepare the Blueberry Topping:
      • In a saucepan, combine the fresh blueberries, 1/4 cup sugar, water, and lemon juice. Simmer over medium heat, stirring occasionally, until the berries burst and the mixture thickens.
      • Remove from heat and cool to room temperature.
      • Place in the refrigerator until ready to use.
    5. Assemble the Cheesecake:
      • Once the cheesecake has cooled in the oven, remove it from the water bath and run a knife around the edges to loosen it from the pan.
      • Refrigerate the cheesecake for at least 5-6 hours, or preferably overnight, to allow it to set.
    6. Serve:
      • Before serving, spread the blueberry topping over the chilled cheesecake.

    Enjoy this decadent creamy cheesecake with a luscious fresh blueberry topping, a true delight for dessert lovers!